|
Tizen Native API
|
In this example, we demonstrate the use of Evas box objects. We cover changing boxes' layouts (with a custom layout, besides the ones provided by Evas), box padding and alignment influence on the layouts, insertion and removal of box items.
The interesting part of the code starts, naturally, when we add a box object to the canvas. Just after it, we place five rectangles, with random colors, inside of it. Those rectangles get a minimum size hint of 50 pixels on each axis, which will be respected by most of the box's possible layouts:
Just like in other Evas examples, we have a white background on the canvas and a red border around the container object of interest, the box, to mark its boundaries. Resizing of the canvas will keep the box's proportion with regard to the whole canvas', so that you can experiment with different sizes of the box to accommodate its children:
Again, one interacts with this program by means of key commands:
Let's start with the numeric ones, each of which will impose a different layout on the box object.
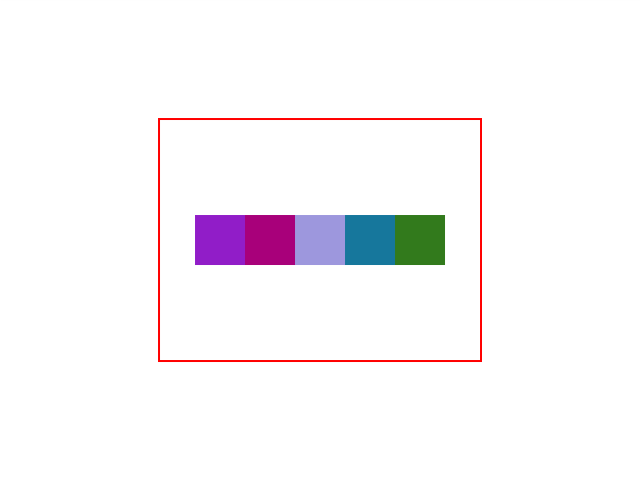
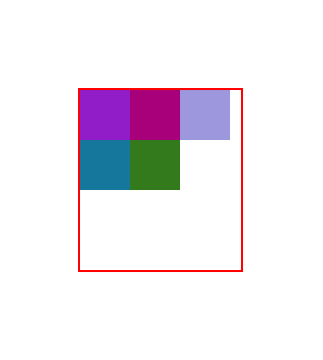
The initial layout the box starts at is the one triggered by the key '1' -- the horizontal layout. Thus, the initial appearance of this program, demonstrating this layout, is something like:
The vertical layout ('2' key) is very similar, but just disposing the items vertically:
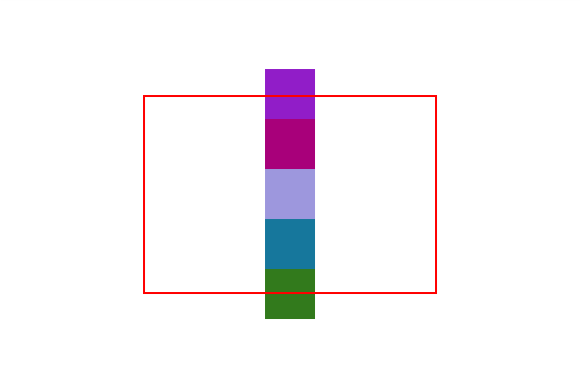
Note the influence of the (default) 0.5 box alignment property, which will let the children line in the middle of the box's area. Also, because the space required by them extrapolates the box's height (we resized it to be smaller), they'll be drawn out if its bounds.
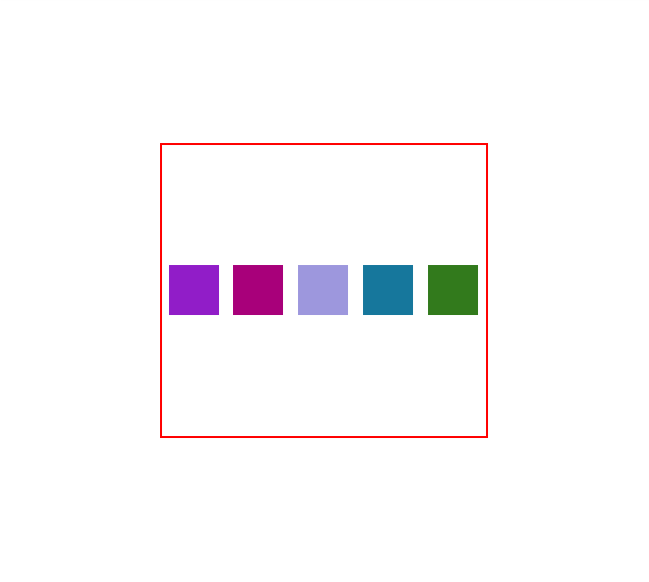
Next, comes the horizontal homogeneous layout ('3' key). See how it reserves an equal amount of space for each child to take:
Its vertical equivalent can be triggered by the '4' key. The next different layout of interest is the horizontal maximum size homogeneous ('5' key). It will reserve cells to children sized equally to the dimensions of the child with bigger size (or minimum size hints). For this example, all cells would be just the size of our rectangles' minimum size hints and, to prove that, insert a new (smaller) rectangle at position 3, say, with Ctrl and 3 keys together:
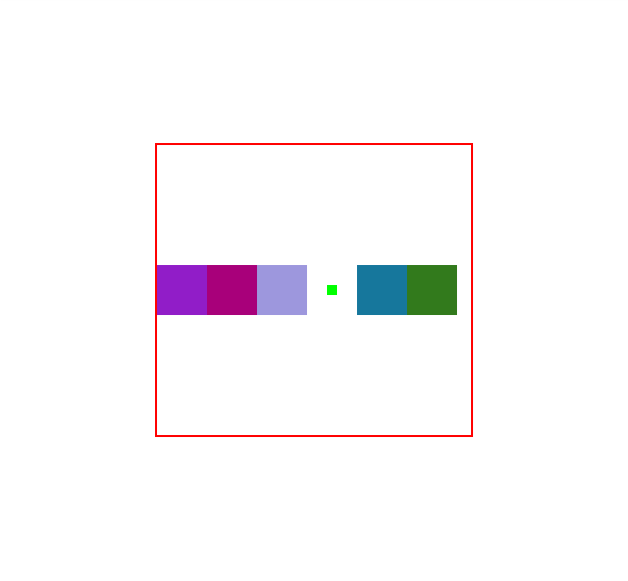
The code for the commands inserting and deleting box items is:
Try the '6' key for the vertical equivalent of the last shown layout. Then, comes the flow layout, triggered by the '7' key. We make our box small to demonstrate the effect on the items layouting:
The next two numerical commands are for the vertical equivalent of the last and the stack one, respectively. Try them out to get their looks.
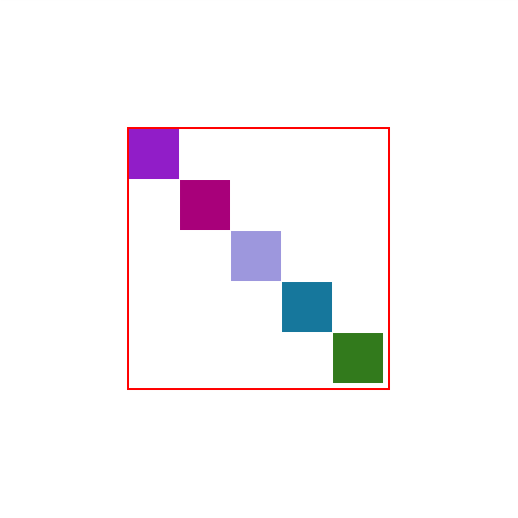
The last numerical key, '0', shows the effect of a custom layout on the box. We wrote one that would split the width and height of the box equally and, then, place the items in the cells in the diagonal:
Finally, the 'a' and 'p' commands will change the box's alignment and padding property values, respectively. For each of the layouts above, see the effects they make by setting different values on those properties.
The full code for this example follows. For an exercise on the effect of children box elements' size hints on a box layout, try the Evas alignment, minimum size, maximum size, padding and weight hints example.