
The Heart Rate Monitor sample application demonstrates how you can measure the user's current heart rate.
The following figure illustrates the main screens of the Heart Rate Monitor.
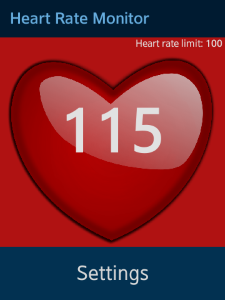
Figure: Heart Rate Monitor screens
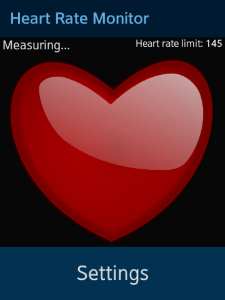
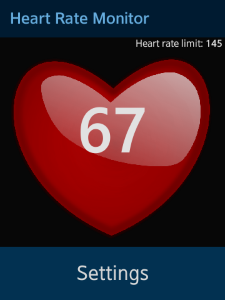

The application opens with the main screen that shows the heart rate being measured. After the measurement is complete, the current heart rate is displayed.
The heart image in the background is animated to beat in sync with the measured heart rate. The application continues to measure the heart rate and update the heart rate value and animation accordingly. If the application cannot measure the heart rate, an information screen is shown after 10 seconds.
You can set a limit for the heart rate:
- On the main screen, click Settings.
- Use a slider to define a limit you want monitor, and click OK.
The defined limit is shown in the top right corner of the main screen, under the header.
If the measured heart rate exceeds the limit, the application background turns red and the device starts vibrating for 20 seconds. The vibration happens in 1-second bursts separated by 1-second pauses.
Prerequisites
- Device must have a heart rate sensor, or you must use the Emulator.
- To ensure proper application execution, the following privileges must be set:
- http://tizen.org/privilege/healthinfo
- http://developer.samsung.com/privilege/healthinfo
Source Files
You can create and view the sample application project including the source files in the IDE.
The application uses a simple Model View (MV) architecture. The core part determines the architecture, and the application part determines the application behavior. The core.js file implements a simple Asynchronous Module Definition (AMD) and specifies how modules are defined.
| File name | Description |
|---|---|
| config.xml | This file contains the application configuration. |
| css/style.css | This file contains the CSS styling for the application UI. |
| images/ | This directory contains the images used to create the application UI. |
| index.html | This is a starting file from which the application starts loading. It contains the layout of the application screens. |
| js/app.js | This file starts the application. |
| js/core | This directory contains the application framework. |
| js/core/core.js | This file contains the functions for defining modules. |
| js/helpers/vibration.js | This file contains the helper functions for starting and stopping device vibration. |
| js/models/heartRate.js | This file contains the module for managing the heart rate sensor. |
| js/views/init.js | This file contains the functions responsible for the view of the application, and the back key and low battery handling. |
| js/views/main.js | This file contains the functions for handling the application behavior. |
| js/views/page/init.js | This file defines the application UI and handles the interaction with the user. |
| lib/tau | This directory contains the TAU library files. |
Implementation
Defining the Application Layout
The application has 2 screens, whose content is defined in the index.html file:
Main screen shows the current heart rate.
The screen layout consists of a header section with the application name, a content section with <div> elements for displaying the current heart rate, defined limit, measuring time, and the heart image, and a footer section with the Settings button. The screen also has a setting-popup popup element used to define the limit.
The views/main.js file defines the screen behavior.
<!--index.html-->
<!DOCTYPE html>
<html>
   <head>
      <meta name="viewport" content="width=device-width, initial-scale=1.0, maximum-scale=1.0, user-scalable=no">
      <meta charset="utf-8"/>
      <meta name="description" content="Heart Rate Monitor"/>
      <title>Heart Rate Monitor</title>
      <link rel="stylesheet" href="lib/tau/wearable/theme/default/tau.css" />
      <link rel="stylesheet" media="all and (-tizen-geometric-shape: circle)" href="lib/tau/wearable/theme/default/tau.circle.min.css">
      <link rel="stylesheet" type="text/css" href="./css/style.css"/>
   </head>
   <body>
      <div class="ui-page ui-page-active" id="main">
         <div class="ui-header">
            <h2 class="ui-title">Heart Rate Monitor</h2>
         </div>
         <div class="ui-content">
            <div id="heart-rate-value"></div>
            <div id="heart">
               <div id="heart-img"></div>
            </div>
            <div class="limit-info">
               Heart rate limit: <span id="limit-info-value"></span>
            </div>
            <div id="measuring-info">
               Measuring...
            </div>
         </div>
         <footer class="ui-footer ui-bottom-button">
            <a href="#settings-popup" data-rel="popup" class="ui-btn">Settings</a>
         </footer>
         <div id="settings-popup" class="ui-popup">
            <div class="ui-popup-content">
               Set heart rate limit.
               <div id="settings-heartrate"><input id="settings-heartrate-value" type="text" value="" maxlength="3" disabled/></div>
               <div id="settings-slider">
                  <input id="slider" type="range" min="1" max="220" value="" />
               </div>
            </div>
            <div class="ui-popup-footer ui-side-button ui-grid-col-2">
               <a id="cancel-popup-btn" href="#" class="ui-btn btn-icon-cancel" data-rel="back">Cancel</a>
               <a id="ok-popup-btn" href="#" class="ui-btn btn-icon-check" data-rel="back">OK</a>
            </div>
         </div>
      </div>

      <script src="./lib/tau/wearable/js/tau.js"></script>
      <script src="./js/core/core.js" data-main="./js/app.js"></script>
   </body>
</html>
Information screen shows an instruction if the application cannot measure the heart rate.
The screen layout consists of a header section with the screen title, a content section with instructions in case the heart rate cannot be measured, and a footer with the Back button:
<!--index.html-->
<div class="ui-page" id="info">
   <div class="ui-header">
      <h2 class="ui-title">HRM Info</h2>
   </div>
   <div class="ui-content">
      <div class="info-text">
         Try again. Clean the sensor, then attach Gear snugly to top or under side of wrist, not against the bone. Be still and quiet.
      </div>
   </div>
   <footer class="ui-footer ui-bottom-button">
      <a id="info-back-btn" class="ui-btn">Back</a>
   </footer>
</div>
Monitoring the Heart Rate
To define a heart rate module that provides processed heart rate data from the Sensor API:
-
Define an empty module:
/* js/models/heartRate.js */ define( { name: 'models/heartRate', requires: [ 'core/event', 'core/storage/idb' ], def: function modelsHeartRate(req) { /* Implementation */ } }); -
Create the required variables:
- heartRateData represents the heart rate monitor data. It contains a rate numeric field that contains the current heart rate value.
- heartRate is a reference to the heart rate sensor.
/* js/models/heartRate.js */ var heartRateData = {}; var heartRate = null; -
Define the resetData() method, which cleans the heartRateData object:
/* js/models/heartRate.js */ function resetData() { heartRateData = { rate: '-' }; } -
Define the init() method, which initializes the heart rate module:
/* js/models/heartRate.js */ function init() { resetData(); /* Initialize the heart rate limit */ heartRate = (tizen && tizen.humanactivitymonitor) || (window.webapis && window.webapis.motion) || null; } -
Define the start() method, which starts reading data from the sensor.
The init() method from the main module calls the start() method during the main module initialization.
/* js/models/heartRate.js */ var CONTEXT_TYPE = 'HRM'; function start() { resetData(); heartRate.start(CONTEXT_TYPE, function onSuccess(heartRateInfo) { handleHeartRateInfo(heartRateInfo); }, function onError(error) { console.log('error: ', error.message); }); } /* js/views/main.js */ function init() { heartRate.start(); /* Other actions */ } -
The start() method success callback calls the handleHeartRateInfo() method, which stores the received data in the heartRateData object and fires a change event using the event module from the Core framework:
/* js/models/heartRate.js */ function setHeartRateData(heartRateInfo) { var pData = { rate: heartRateInfo.heartRate }; heartRateData = pData; return pData; } function getData() { return heartRateData; } function handleHeartRateInfo(heartRateInfo) { setHeartRateData(heartRateInfo); ev.fire('change', getData()); } -
When the application terminates (after the user presses the back key on the main screen), the back key event handler calls the stop() method in the heart rate module. The stop() method stops the sensor and unregisters the previously registered listener.
/* js/models/heartRate.js */
function stop()
{
   heartRate.stop(CONTEXT_TYPE);
}

/* js/views/init.js */
var hr = req.models.heartRate;

function onHardwareKeysTap(ev)
{
   /* Other actions */
   hr.stop();
   /* Other actions */
}
Setting and Storing the Heart Rate Limit
The heart rate module exports methods for setting and getting the limit value from the storage.
To manage the heart rate limit value:
- When reading from or writing to the storage, the core.storage.idb.write and core.storage.idb.read events are triggered:
/* js/models/heartRate.js */ var st = req.core.storage.idb, STORAGE_IDB_KEY = 'limit'; function getLimit() { st.get(STORAGE_IDB_KEY); } function setLimit(value) { st.set(STORAGE_IDB_KEY, value); } ev.on( { 'core.storage.idb.write': onWriteLimit, 'core.storage.idb.read': onReadLimit }); - The storage writing and reading operations are asynchronous, and the event module from the Core framework calls callbacks when the operations are completed.
The events are handled by the onWriteLimit() and onReadLimit() callback methods. These methods trigger the models.heartRate.setLimit and models.heartRate.getLimit events to notify the view that the operations are completed.
/* js/models/heartRate.js */
function onWriteLimit()
{
   ev.fire('setLimit');
}

function onReadLimit(e)
{
   ev.fire('getLimit', e);
}
Monitoring the Heart Rate Limit
When the heart rate exceeds the defined limit, the application background changes and the device vibrates.
To monitor the limit:
-
Use the bindEvents() method to register the event listeners for when the user sets a new limit.
The asynchronous heartRate.setLimit() method stores the new limit value and fires the models.heartRate.setLimit() event.
/* js/views/main.js */ var HRLimit = null, /* Heart rate limit value */ heartRate = null, /* Reference to the heartRate module */ okPopupBtn = null; /* Reference to the popup button */ function onOkPopupBtnClick() { HRLimit = settingsHeartrateValue.value; heartRate.setLimit(HRLimit); } function bindEvents() { okPopupBtn = document.getElementById('ok-popup-btn'); okPopupBtn.addEventListener('click', onOkPopupBtnClick); } - Implement and register the models.heartRate.setLimit listener. The OnSetLimit() method calls the asynchronous heartRate.getLimit() method, which fires the models.heartRategsetLimit event.
/* js/views/main.js */ function onSetLimit() { heartRate.getLimit(); } ev.on( { 'models.heartRate.setLimit': onSetLimit }); - Implement and register the models.heartRate.getLimit listener to update the UI:
/* js/views/main.js */ var settingsHeartrateValue = null, /* Text input element for set heart rate limit value */ limitInfoValue = null, /* Text element showing the set heart rate limit value */ slider = null, /* Slider input element for changing heart rate limit value */ HRLimit = null; /* Heart rate limit */ function onGetLimit(e) { var limit = e.detail.value; if (limit === undefined) { limit = HRLimit; } settingsHeartrateValue.value = limit; limitInfoValue.innerHTML = limit; slider.value = limit; HRLimit = limit; setLimitExceeded(currentRate > HRLimit); } ev.on( { 'models.heartRate.getLimit': onGetLimit }); -
The setLimitExceeded() method checks whether the current heart rate is higher than the set limit. If the limit is lower than the measured heart rate, the main screen gets a new CSS style class which changes its background color to red and the device starts to vibrate. Otherwise, the CSS style class is removed.
/* js/views/main.js */ var page = null, /* Reference to the main screen element */ vibration = null; /* Reference to the vibration module */ function setLimitExceeded(exceeded) { if (exceeded) { page.classList.add('limit-exceeded'); vibration.start(); } else { page.classList.remove('limit-exceeded'); vibration.stop(); } } -
The application starts and stops the device vibration at 1-second intervals using the helpers/vibration module. To implement the vibration module:
- Define the vibration module:
/* js/helpers/vibration.js */ define( { name: 'helpers/vibration', def: function vibrationModule() { /* Variables */ function vibrate() { /* Implement the vibration */ } function start() { /* Start the vibration */ } function stop() { /* Stop the vibration */ } return { start: start, stop: stop }; } }); - Define the vibrate() method, which starts the device vibration and stops it when the time has passed:
/* js/helpers/vibration.js */ var launchTimestamp = 0, /* Vibration launch time */ /* Duration of the whole process */ /* After this time vibration is stopped even without stop method call */ PROCESS_DURATION = 20000, intervalId = 0, /* Vibration interval task ID */ VIBRATION_DURATION = 1000; /* Duration of vibration step */ function vibrate() { var stopTime = launchTimestamp + PROCESS_DURATION, currentTime = new Date().getTime(); if (currentTime > stopTime) { clearInterval(intervalId); } else { navigator.vibrate(VIBRATION_DURATION); } } - Define the start() method, which starts the vibration process:
/* js/helpers/vibration.js */ function start() { if (intervalId === 0) { intervalId = setInterval(vibrate, VIBRATION_DURATION + PAUSE_DURATION); launchTimestamp = new Date().getTime(); } } - Define the stop() method, which stops the vibration process:
/* js/helpers/vibration.js */
function stop()
{
   if (intervalId !== 0)
   {
      clearInterval(intervalId);
      intervalId = 0;
   }
}
- Define the vibration module:
Calculating the Beat for the Heart Image
The speed of the heart image animation depends on the current heart rate, and it is recalculated every time the heart rate value changes:
-
The default duration of 1 animation of 2 heart beats lasts 1.5 seconds. When the heart rate changes, 120 is divided by the current heart rate and rounded to one digit after the decimal place to determine the new duration.
/* js/views/main.js */ function onHeartRateDataChange(heartRateInfo) { var rate = heartRateInfo.detail.rate, activePage = document.getElementsByClassName('ui-page-active')[0], activePageId = activePage ? activePage.id : ''; updateAnimationDuration(rate); setLimitExceeded(rate > HRLimit); } function updateAnimationDuration(rate) { var animationDuration = '1.5'; if (rate < 1) { animationDuration = 0; } else { animationDuration = (120 / rate).toFixed(1); } if (animationDuration !== currentAnimationDuration) { heartImg.style.webkitAnimationDuration = animationDuration + 's'; currentAnimationDuration = animationDuration; } } -
The CSS style file shows how each animation contains 2 heart beats:
/* css/style.css */
heart-img
{
   margin: 5% auto;
   background-image: url("./images/heart.png");
   background-position: center;
   background-size: cover;
   width: 60%;
   height: 60%;
}

.animate
{
   -webkit-animation: heartMove 1.5s infinite;
}

@-webkit-keyframes heartMove
{
   0%, 50%, 100%
   {
      width: 45%;
      height: 45%;
   }
   25%, 75%
   {
      width: 60%;
      height: 60%;
   }
}