
The (Circle) AppShortcutsWidget sample application demonstrates how you can show and launch applications from a Web widget.
The following figure illustrates the main screen of the (Circle) AppShortcutsWidget.
Figure: (Circle) AppShortcutsWidget screen
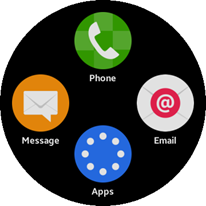
The widget application opens with a main screen that shows 4 application icons.
If an icon is clicked, it launches the related application.
You can modify the application icons by editing the source files.
Source Files
You can create and view the sample application project, including the source files, in the IDE.
| File name | Description |
|---|---|
| config.xml | This file contains the application information for the platform to install and launch the application, including the view mode and the icon to be used in the device menu. |
| css/style.css | This file contains the CSS styling for the application UI. |
| index.html | This is a starting file from which the application starts loading. It contains the layout of the application screens. |
| js/app.js | This file contains the code for handling the main functionalities of the application. |
| js/data.js | This file contains the application data. |
Implementation
To implement the application shortcut widget:
- Add the required privilege.
To allow the widget to launch applications, you must request permission by adding the corresponding privilege to the config.xml file:
<tizen:privilege name="http://tizen.org/privilege/application.launch"/>
- Create a layout for the widget:
<body>
   <div class="main-container">
      <div id="container-top" class="container-top">
         <img id="container-top-image" class="image"/>
         <div id="container-top-title" class="title"></div>
      </div>
      <div id="container-left" class="container-left">
         <img id="container-left-image" class="image"/>
         <div id="container-left-title" class="title"></div>
      </div>
         <div id="container-right" class="container-right">
         <img id="container-right-image" class="image"/>
         <div id="container-right-title" class="title"></div>
      </div>
      <div id="container-bottom" class="container-bottom">
         <img id="container-bottom-image" class="image"/>
         <div id="container-bottom-title" class="title"></div>
      </div>
   </div>
</body>
- Retrieve the application data.
You can get the data for the application shortcuts (the icon name and image, and the application ID for launching the application) from the data.js file:
for (var pos in shortcuts) { document.getElementById('container-' + pos).addEventListener('click', launchApp.bind(this, shortcuts[pos].appId)); document.getElementById('container-' + pos + '-image').setAttribute('src', 'image/' + shortcuts[pos].image); document.getElementById('container-' + pos + '-title').textContent = shortcuts[pos].title; } /* data.js */ shortcuts = { "top": { "title": "Phone", "image": "phone.png", "appId": "" }, "left": { "title": "Message", "image": "messages.png", "appId": "" }, "right": { "title": "Email", "image": "email.png", "appId": "" }, "bottom": { "title": "Apps", "image": "apps.png", "appId": "" } }; - Launch the application when its icon is clicked:
var launchApp = function(appId)
{
   function onsuccess()
   {
      /* Called if the launch is succeeds */
      /* Do nothing now */
   }

   window.tizen.application.launch(appId, onsuccess);
};