Configuring the Package Manager
The Package Manager configuration allows you to manage the packages of Tizen Studio. With the Package Manager configuration, you can change the options for the package repository for the main and extension SDK, as well as the proxy settings to access the package repository. If you want to configure the Package Manager in the command line interface, see Updating with the CLI Package Manager.
Configuring the Main SDK Repository
You can set the configuration for installing or updating Tizen Studio using one of the following methods. Before changing the package repository, note that the installed packages may be removed automatically, and you may need to reinstall the packages from the changed repository.
Configuring the Package Repository
The package repository is a server which stores all the packages that you are using or will use in Tizen Studio. Using the Package Manager, you can install or update packages from that repository. Rather than providing a single repository for the main SDK, several CDNs (Content Delivery Networks) are offered around the globe for your convenience. You can select the nearest package repository to install or update packages more quickly.
Figure: Configuration window with the Package Repository selected
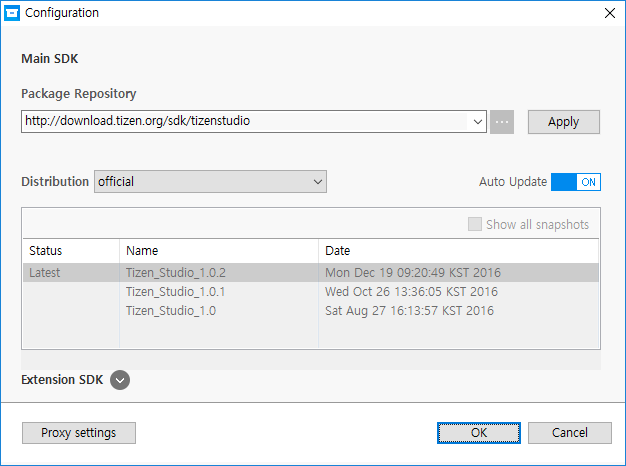
To set the package repository:
- Select an available repository from the drop-down list. Select the nearest repository for quickest installation and update.
- Click Apply next to the combo box. Wait for a few seconds until the repository is validated.
- In the Distribution combo box, select the distribution you want to access.
- On your selection in the Distribution combo box, different snapshots are listed in the snapshot box. By switching off the Auto Update switch, you can select the specific snapshot in the list. If you leave the switch on, the Package Manager always updates all the packages from the latest snapshot.
- Click OK to confirm your setting.
Note
If you switch off the Auto Update option, you can select an earlier snapshot than the snapshot you are currently using. Be careful when doing this, since the update can cause entire packages to be removed to guarantee system integrity.
Configuring the SDK Image
To install or update packages with the SDK image:
-
Enter the full path of the SDK image file in the Package Repository box, or click
 next to the combo box to open the file browser.
In the file browser, select the SDK image file, and click OK. When you select the image file, the image’s origin repository information is displayed below the combo box.
-
Click OK to confirm your setting.
Note
If you install or update packages using an image file, the SDK image’s origin repository URL or distribution ID can be different than the current packages’ URL or distribution ID. Be careful when doing this, since the installation or update can cause entire packages to be removed to guarantee system integrity.
Configuring the Extension SDK Repository
Tizen Studio supports extension packages from the extension repositories, which are developed and managed by external developers and companies. To configure the extension SDK, you must unfold the configuration panel by clicking Extension SDK ![]() at the bottom of the dialog box. To return to the package repository configuration, click Extension SDK
at the bottom of the dialog box. To return to the package repository configuration, click Extension SDK ![]() to fold the extension SDK panel, or scroll up.
to fold the extension SDK panel, or scroll up.
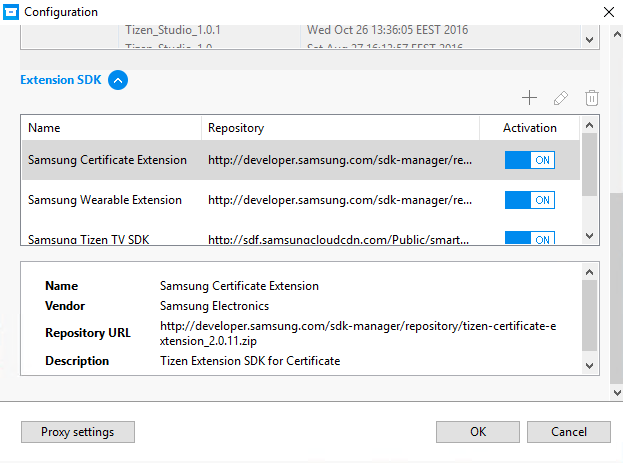
Figure: Configuration window with the Extension SDK unfolded
Adding an Extension Repository
To add an extra repository:
- In the Configuration dialog box, scroll down to the Extension SDK panel, or click Extension SDK
 to unfold it.
 - Click + above the repository information table.
- Enter values to the Name and Repository fields in the Add Repository dialog box. The Repository field indicates the external server address. You can also click to select a local image file or local server location.
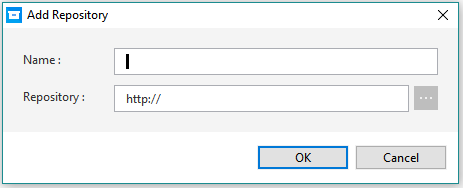
- Click OK.
- In the Configuration dialog box, check the detailed repository information below the table.
- Click OK to confirm.
Removing an Extension Repository
To remove an extra repository:
- In the Configuration dialog box, scroll down to the Extension SDK panel, or click Extension SDK to unfold it.
- Select an extension repository in the repository table.
- Click the
 icon right above the table.
 - In the Configuration dialog box, check that the extension repository has been removed.
Modifying an Extension Repository
To modify an extra repository:
- In the Configuration dialog box, scroll down to the Extension SDK panel, or click Extension SDK to unfold it.
- Click the
 icon above the repository information table.
 - Modify the values of the Name and Repository fields in the Modify Repository dialog box. The Repository field indicates the external server address. You can also click to select a local image file or local server location.
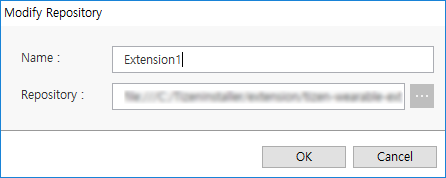
- Click OK.
- In the Configuration dialog box, check that the repository information has changed below the table.
- Click OK to confirm.
Activating or Deactivating an Extension Repository
To activate or deactivate the extra repository:
- In the Configuration dialog box, scroll down to the Extension SDK panel, or click Extension SDK to unfold it.
- Select the
 on-off switch icon in the Activation column in the repository table.

- Click OK to confirm.
Note
If the extension repository is deactivated, the packages from that repository are no longer shown in the Package Manager. However, if you activate the extension repository, the packages are shown in the Package Manager again.
Configuring the Proxy
The Package Manager provides the network option to configure a proxy to connect to repository servers. To set the proxy:
- Click the Proxy Settings button at the bottom of the Configuration dialog box.

- Select the proxy option you want to use:
- No proxy: The Package Manager accesses the repository servers directly.
- System proxy settings: The Package Manager accesses the repository servers through the system proxy.
- Manual proxy settings: The Package Manager accesses the repository servers through the IP and Port value that you specify.
- Click Apply to confirm.
Related information
- Dependencies
- Tizen Studio 1.0 and Higher