Set Project Properties
Before you implement the actual application functionality, define all the necessary properties for your application project:
- To set the application project properties for build and JSON properties, right-click the project in Tizen Studio Project Explorer view and select Properties. After setting or changing a property, click OK.
- To define the Web application configuration, edit the
config.xmlfile.Note
Only modify the Web application configuration by using the configuration editor in Tizen Studio. If you create or edit the
config.xmlfile using any other text editor, your application may not work as expected.
After you have finished setting the project properties, you are ready to design the UI.
Set build properties
You can set build properties for your project. To select the build properties:
- In the Properties window, select Tizen Studio > Package > Web.
- Check Optimize web resources, and add any files for excluding optimization in the Optimization panel.
Set the JSON property
You can set a JSON property for your project. To select the JSON property:
- In the Properties window, select Tizen Studio > Web > JSON Properties.
- Check Enable JSON validation in project.
Set the Web application configuration
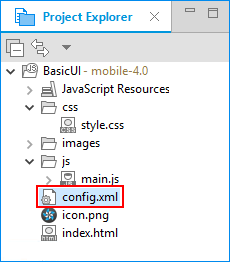
The Web application configuration consists of application information, such as version, features, and privileges, which are available for the application. To configure the application information in the Web application configuration editor, double-click the application config.xml file in the Project Explorer view.
Figure: Setting the application configuration
You can edit the application properties using the form tabs of the Web application configuration editor.
Define and edit general information in the Overview tab
You can define and edit general information about the application in the Overview tab of the Web application configuration editor.
You can perform the following tasks using the Overview tab:
-
View the application identifier.
Tizen Studio creates automatically an application ID, which uniquely identifies the application within the package.
-
Set the content.
The content represents the start-up file of the Web application.
-
Set the application name.
The application name is displayed in an application menu or in other contexts.
-
Set the version.
The format of the current application version is “x.y.z”.
-
Add an application icon.
You can add a launcher icon to your application by defining it in the Icon panel.
The following table describes the available icon format and size.
Table: Icon format and size
Format Size [Xhigh (HD)] 32-bit PNG with alpha 117 x 117 pixels -
Define the application author, license, and description in the Managing the Application section:
- Author field represents the person or organization that created the Web application.
- E-mail field represents the email address of the author.
- Web Site field represents the IRI associated with the Web application, such as a homepage or a profile on a social network.
- License field represents the software license, which can include content, such as a usage agreement, redistribution statement, and copyright license terms, under which the content of the Web application package is provided.
- License URL field represents the valid IRI or path associated with the software or content license.
- Description field represents the human-readable description of the Tizen Web application package.
-
Define the UI preferences of the application in the Managing the Application UI section:
- Width field represents the start-up file viewport width.
- Height field represents the start-up file viewport height.
- View Modes field represents the preferred view mode (maximized fullscreen).
Declare required software or hardware features in the Features tab
You can declare any device software or hardware features that your application requires to run properly. The declaration can be used for application filtering in the official site for Tizen applications.
To enable filtering for your Web application, follow these steps:
-
In the Features tab, click +.
-
Select the needed features from the predefined list of features available for filtering.
-
Click Finish.
-
Upload and publish the application package on the store.
If a Tizen-powered device requests applications, the store displays a list containing only applications compatible with the user’s device.
After saving the feature information with the Web application configuration editor, you can see the added code in the Source tab:
<feature name="http://tizen.org/feature/network.nfc"/>
Specify privileges in the Privileges tab
You can use features and services provided by privileged APIs, which handle platform and user-sensitive data. You can specify an API, or API groups, accessed and used by the Web application in the Privileges tab of the Web application configuration editor. The tab serves as a standardized tool to request the binding of an IRI-identifiable runtime component for a Web application to use at runtime.
To add a privilege, follow these steps:
-
In the Privileges tab, click +.
-
In the Add privilege window, select an option:
- Internal: Select the needed privileges from the predefined list of API privileges.
- Privilege name: Manually enter the URL containing a privilege definition.
- File: Click Browse and select a privilege file (with the
.xmlor.widlprocxmlextension).
-
Click Finish.
After saving the privilege information with the Web application configuration editor, you can see the added code in the Source tab:
<tizen:privilege name="http://tizen.org/privilege/application.launch"/>
Define external access policies in the Policy tab
According to the W3C Access Requests Policy (WARP), you cannot access external network resources by default. If you require access to an external network resource, you must request network resource permissions for the Web application using the Policy tab of the Web application configuration editor.
The following table lists the policy properties you can edit in the Policy tab.
Table: Policy information
| Property | Description |
|---|---|
|
content-security-policy |
Used to define an additional content security policy for a packaged or hosted application. The policy string is defined according to Content Security Policy Level 2 (in mobile and TV applications) and Content Security Policy 1.0 (in wearable applications). |
|
content-security-policy-report-only |
Used to define an additional content security policy for a packaged or hosted application (for monitoring purposes only). |
|
allow-navigation |
Used to define a list of URL domains allowed for the Web application. This attribute is optional. |
|
Access |
Used to define network resource permissions. |
After setting the policy information with the Web application configuration editor, you can see the added code in the Source tab:
<access origin="http://www.tizen.org" subdomains="true"/>
<tizen:allow-navigation>tizen.org *.tizen.org<tizen:allow-navigation/>
<tizen:content-security-policy>script-src 'self'</tizen:content-security-policy>
<tizen:content-security-policy-report-only>script-src 'self';</tizen:content-security-policy-report-only>
Add localized application details in the Localization tab
You can provide localized versions of the application name, description, and license in the Localization tab of the Web application configuration editor.
To add a localized name, description, or license:
-
In the Name panel, click +. Select the language, define the application name for that language, and click OK.
The following example shows the setting in the
config.xmlfile:<name xml:lang="en-gb">Lee</name> -
In the Description panel, click +. Select the language, define the application description for that language, and click OK.
The following example shows the setting in the
config.xmlfile:<description xml:lang="en-gb">Widget</description> -
In the License panel, click +. Select a language, define the license and license URI for that language, and click OK.
The following example shows the setting in the
config.xmlfile code:<license xml:lang="en-gb" href="http://www.apache.org/licenses/LICENSE-2.0.html"> Apache License, Version 2.0 </license>
You can localize a Web application to adapt to various languages and cultural environments by creating different Web application versions for different languages. For more information, see Localizing Web Applications.
Declare name-value pairs in the Preferences tab
You can declare name-value pairs which can be set and retrieved using the Widget Interface API (in mobile, wearable, and TV applications) in the Preferences tab of the Web application configuration editor. These name-value pairs, or preferences, are used by the Web application during execution.
To add preferences, click +. A new row appears in the table. Enter values in the Name and Value columns. You can set a preference as read-only by setting the Read-only column value as true.
After saving the preference information with the Web application configuration editor, you can see the added code in the Source tab:
<preference name="key" value="value" readonly="false"/>
Configure the Tizen schema extension in the Tizen tab
The Tizen tab of the Web application configuration editor shows the Tizen schema extension. Some of the attributes specified on this tab are mandatory and must be defined, whereas others are optional.
The following table describes the schema extension properties that you can edit.
Table: Tizen-specific information
| Property | Description | |
|---|---|---|
|
Application |
ID |
Tizen application ID, which is randomly created from the Tizen package ID and project name. This attribute is mandatory. |
|
Required Version |
Indicates the minimum API version that the Web application supports. This attribute is mandatory and must be a float value, such as 1.0 or 2.0. |
|
|
Launch Mode |
Indicates whether the application is launched as a main (single) or sub application, or whether a caller application defines the launch mode when the application is launched by an application control request. |
|
|
Ambient Support |
Indicates whether the Web application supports the ambient mode. |
|
|
Content |
Src |
In Widget Packaging and XML Configuration, the Web application start page is a document within the Web application package. The Tizen WRT allows the start page to be hosted on an external server. If the start page is on an external server, this attribute points to it. |
|
Setting |
Screen Orientation |
Sets the application screen orientation to landscape or portrait mode, or auto-rotation. |
|
Context Menu |
Sets the Web application support for context menus. |
|
|
Background Support |
Defines whether the execution of the Web application continues when the application is sent to the background. |
|
|
Encryption |
Sets the encryption of application resources (JS, CSS, and HTML files). |
|
|
Install Location |
Sets the installation location, for example, the SD card. |
|
|
HW Key Event |
Sets the support for the hardware key. |
|
|
Application Control |
Describes the application control functionalities provided by the application. To define an application control used to access the functionality of your application, click + in the Application Control panel and define the details. The operation, uri, and mime fields describe the functionalities that other applications can request and the src field describes the application page that handles the request. The following example shows the setting in the |
|
|
Account |
- |
To register an account provider, click + in the Account section and define the account provider information. |
|
Display name |
Used to define the localized display name of the account provider. |
|
|
Multiple account |
Indicates whether multiple accounts are supported. This attribute is mandatory. |
|
|
Icon |
Used to define the path of the icon representing the account provider. The icon image is used by account settings and must be placed in a shared directory. The size is 72 x 72. |
|
|
Small icon |
Used to define the path of the small icon representing the account provider. The icon image is used by account settings and must be placed in a shared directory. The size is 45 x 45. |
|
|
Capabilities |
The capabilities of the account provider defined in the IRI format: The following predefined capabilities can be used:
To add a capability, click an empty row in the Capabilities panel table and select a capability you need. |
|
|
Background Category |
Defines the background category type (since Tizen 2.4). |
|
|
Meta Data |
Defines key-value pairs that can be accessed (read-only) through the Application API (in mobile and wearable applications). The following example shows the setting in the |
|
|
Category |
Defines the categories to which a service application belongs. |
|
|
Service |
Defines service application-specific settings. |
|
|
Web Widget |
Defines widget application-specific settings. |
|
Edit the config.xml file in the Source tab
The Source tab of the Web application configuration editor shows the code of the config.xml file. You can edit the basic syntax of the XML document and also see how changes made on the other tabs are reflected in the raw XML source content.
NoteThe
config.xmlmust conform not only to the XML file format but also to the W3C specification requirements. If you edit application information manually in theconfig.xmlfile source code, you can introduce errors preventing the application from running normally.