XAML Support for Tizen.NUI
XAML Namespaces
To use Tizen.NUI, you must define the default namespace as shown in the following code:
XMLCopyxmlns="http://tizen.org/Tizen.NUI/2018/XAML"
NoteThe default namespace must be the root element of the XAML file.
The following code example shows a XAML namespace declaration:
XMLCopyxmlns:l="clr-namespace:Tizen.NUI.Examples;assembly=TestXaml"
The namespace prefix is specified while declaring an instance of a type from an imported namespace, as shown in the following XAML code example:
                XML

                    Copy


            <View x:Name="view" BackgroundColor="{Binding Color}" Size2D="440,400" Position2D="20,10" >
    <View.BindingContext>
      <l:HslViewModel x:Name="hsl" Color="Red" />
    </View.BindingContext>
</View>
The default namespace specifies the elements defined within the XAML file with no prefix referring to the Tizen.NUI classes, such as View.
In the following XAML code example, namespace declaration uses x as prefix:
xmlCopyxmlns:x="http://schemas.microsoft.com/winfx/2009/xaml"
The x namespace declaration specifies the elements defined within the XAML with a prefix of x.
The following table outlines the x namespace attributes supported by Tizen.NUI:
| Construct | Description |
|---|---|
| x:Arguments | Specifies constructor arguments for a non-default constructor, or for a factory method object declaration. |
| x:Class | Specifies the namespace and class name for a class defined in XAML. The class name must match the class name of the code-behind file. It is a must to keep this construct in the root element of a XAML file. |
| x:FactoryMethod | Specifies a factory method that can be used to initialize an object. |
| x:Key | Specifies a unique user-defined key for each resource in a ResourceDictionary. The key’s value is used to retrieve the XAML resource and is typically used as the argument for the StaticResource Markup Extension. |
| x:Name | Specifies a runtime object name for the XAML element. Setting x:Name is similar to declaring a variable in code. |
For more information, see https://docs.microsoft.com/en-US/xamarin/xamarin-forms/xaml/namespaces.
Data Binding
Data bindings allow the properties of two objects to be linked together. Therefore, a change in one property causes the corresponding change in the other property that is linked.
There are two objects, the source and the target. The target property must be a bindable property, which means that the target object must derive from BindableObject. A property of TextLabel such as Text is associated with the bindable property TextProperty.
View-to-View Bindings
You can define data bindings to link properties of two views on the same page. You can set the data binding in XAML using the following:
- Set the
BindingContextproperty of the target element to anx:Referencemarkup extension that references the source element. - Set the target property to a
Bindingmarkup extension that references the source property.
Following is a XAML file that contains a Slider and two TextLabel views. One of the TextLabel view is rotated by the Slider value and the other displays the Slider value:
                XML

                    Copy


            <TextLabel Text="ROTATION" BindingContext="{x:Reference Name=slider}" Position2D="50,50" Rotation="{Binding Path=Value}" Size2D="300,50" HorizontalAlignment="Center" VerticalAlignment="Center" PivotPoint="Center" />

<Slider x:Name="slider" Name="slider" LowerBound="0" UpperBound="360" Value="10" ShowPopup="true" ShowValue="true" ValuePrecision="1" Position2D="50,200" Size2D="300,20" />

<TextLabel BindingContext="{x:Reference slider}" Position2D="50,300" Size2D="300,50" Text="{Binding Value, StringFormat='The angle is {0:F0} degrees'}" />
The Slider contains an x:Name attribute that is referenced by the two TextLabel views using the x:Reference markup extension.
Source and BindingContext
The BindingContext property is one of the two ways to link the source and target objects. You can include a reference to the source object within the binding expression.
The following code shows how the source object and source property can be specified in the Binding markup extension:
                XML

                    Copy


            <TextLabel x:Name="label" Name ="label" Text="Text" Position2D="100,100" Size2D="300,50" PositionX="{Binding Source={x:Reference Name=slider}, Path=Value}" />

<Slider x:Name="slider" Name="slider" LowerBound="100" UpperBound="800" Value="100" ShowPopup="true" ShowValue="false" Position2D="400,400" Size2D="300,20" />
The Binding markup extension has two arguments, one of which is a markup extension for x:Reference. Therefore, a pair of curly braces are nested within the main curly braces:
XMLCopyPositionX="{Binding Source={x:Reference Name=slider}, Path=Value}"
Following are the two ways to specify the link between the source object with the target object:
- Use the
BindingContextto reference the source object. - Use the
Sourceproperty of theBindingmarkup extension.
If you specify both, the Source property takes precedence over the BindingContext.
For more information, see https://docs.microsoft.com/en-US/xamarin/xamarin-forms/xaml/xaml-basics/data-binding-basics.
How to Handle Object Created by XAML
In order to implement various functions in an Application, the instances of objects created in XAML must be referenced and handled in the C# code.
In the following XAML code, Tizen.NUI supports two ways to access the ImageView instance in the sample code:
                XML

                    Copy


            <View x:Class="Tizen.NUI.Examples.xNameDemoPage"
  xmlns="http://tizen.org/Tizen.NUI/2018/XAML"
  xmlns:x="http://schemas.microsoft.com/winfx/2009/xaml">

  <ImageView x:Name="ImageOne" Name="title" Position2D="0,0" Size2D="400,400" ResourceUrl="*Resource*/res/xxx.png"/>

</View>
- View.FindChildByName
- NameScopeExtensions.FindByName<T>
                C#

                    Copy


            View myPage = new xNameDemoPage();
Tizen.NUI.Xaml.Extensions.LoadFromXaml(myPage, typeof(xNameDemoPage));

ImageView title = myPage.FindChildByName("title") as ImageView;

ImageView imageOne = NameScopeExtensions.FindByName<Tizen.NUI.BaseComponents.ImageView>(myPage, "ImageOne");
In View.FindChildByName method, set the Name property of the control as Name="title". In the NameScopeExtensions.FindByName<T> method, set x:Name of the element as x:Name="ImageOne".
To have a better performance, it is recommended to use the NameScopeExtensions.FindByName<T> method.
NoteIf you add the Tizen.NUI.XamlBuild nuget package into a project, and set the XAML file as
Embedded Resource. It will be generated in the .g.cs file. In the .g.cs file, every node withx:Namein XAML has a variable that is generated with a similar name as itsx:Name. You can use it directly in your .xaml.cs file.
How to Define and Use XAML Resources
XAML resources are definitions of objects that can be shared and reused throughout a Tizen.NUI application. These resource objects are stored in a resource dictionary.
View defines a property named as XamlResources, which is of type ResourceDictionary. The ResourceDictionary is a dictionary with string keys and values of an object. Items can be added to this dictionary in XAML, and they can be accessed in XAML with the StaticResource and DynamicResource markup extensions.
DynamicResource is for the dictionary keys associated with values that might change during runtime, while StaticResource accesses elements from the dictionary only once when the elements on the page are constructed.
Create and Consume ResourceDictionary
Each resource has a key that is specified using the x:Key attribute, which becomes a dictionary key in ResourceDictionary.
The following TestStaticDynamicResource example explains the usage of StaticResource and DynamicResource:
                XML

                    Copy


            <View x:Class="Tizen.NUI.Examples.TestStaticDynamicResourcePage"
  xmlns="http://tizen.org/Tizen.NUI/2018/XAML"
  xmlns:x="http://schemas.microsoft.com/winfx/2009/xaml">

  <View.XamlResources>
    <ResourceDictionary>
      <x:String x:Key="urlKey">
          *Resource*/res/picture_m_1.jpg
      </x:String>
      <x:String x:Key="positionKey">
          200, 200
      </x:String>
    </ResourceDictionary>
  </View.XamlResources>`

  <ImageView x:Name="img1" ResourceUrl="{StaticResource urlKey}"  Position2D="{DynamicResource positionKey}"/>
</View>
StaticResource accesses the item in the dictionary only once, while XAML is being parsed and the page is being built. However, DynamicResource maintains a link between the dictionary key and the property set from that dictionary item. If the item in the resource dictionary referenced by the key changes, then DynamicResource will detect that change and set the new value to the property.
When you change the value of "positionKey", DynamicResource will detect that change and set the new value to the Position2D property.
                C#

                    Copy


            Tizen.NUI.Binding.ResourceDictionary dict = Tizen.NUI.GetResourcesProvider.Get().XamlResources;
Tizen.NUI.GetResourcesProvider.Get().XamlResources["positionKey"] = positionX.ToString() + "," + positionY.ToString();
For more information, see https://docs.microsoft.com/en-US/xamarin/xamarin-forms/xaml/resource-dictionaries.
TypeConverters
If you want to convert a string to some custom type in XAML, you need to define a TypeConverter. This changes the string format as a XAML format such as converting Red to Color.Red.
If you write a custom class, and you want instances of your class to be usable as XAML settable attribute values, you might need to write a custom TypeConverter class.
NoteNUI XAML is very similar to WPF XAML. For more information, see TypeConverters and XAML.
Type Conversion
In the XAML file, all the attribute values are represented as type of string with pure text.
Even primitives (ex: Int, Double) are simple text string and they are needed to be changed as the type that XAML processor can understand.
For instance, Tizen.NUI defines some properties that take a value of type Size2D.
Size2D is a value that describes two-dimensional sizes and has two important properties, width and height.
When you are specifying size2D in XAML, you must specify it as a string with a comma between the width and height values:
                XML

                    Copy


            <ImageView PositionX="100" PositionY="320" Size2D="300, 300" ResourceUrl="ImageResourcePath"/>
In this scenario, the type converter is the Size2DTypeConverter class.
If a type converter is not available, you must use verbose markup as shown in the following code:
                XML

                    Copy


            <ImageView PositionX="100" PositionY="320" ResourceUrl="ImageResourcePath">
  <ImageView.Size2D>
    <Size2D Width="300" Height="300"/>
  </ImageView.Size2D>
</ImageView>
NUI TypeConverter
Currently, Tizen.NUI supports the following type converters:
ColorTypeConverterPositionTypeConverterPosition2DTypeConverterSizeTypeConverterSize2DTypeConverterVector2TypeConverterVector3TypeConverterVector4TypeConverterRelativeVector2TypeConverterRelativeVector3TypeConverterRelativeVector4TypeConverter
Therefore, you can define the color, position, Size2D, and so on as string in XAML as shown in the following code:
                XML

                    Copy


            <TextLabel Text="HelloWorld!" BackgroundColor="1.0,0.0,0.0,1.0" Position="20,10,0" Size2D="440,400"/>
Implement Type Converter
If you want to convert a string to some custom type in XAML, you need to define a TypeConverter.
The most important method in TypeConverter is ConvertFromInvariantString, which converts the input string to the required object type.
You can see Size2DTypeConverter as shown in the following code:
                C#

                    Copy


            internal class Size2DTypeConverter : TypeConverter
{
    public override object ConvertFromInvariantString(string value)
    {
        if (value != null)
        {
            string[] parts = value.Split(',');
            if (parts.Length == 2)
            {
                return new Size2D(Int32.Parse(parts[0].Trim(), CultureInfo.InvariantCulture),
                                Int32.Parse(parts[1].Trim(), CultureInfo.InvariantCulture));
            }
        }

        throw new InvalidOperationException($"Cannot convert \"{value}\" into {typeof(Size2D)}");
    }
}
Property Trigger
The following example shows two triggers that changes PositionX of the ImageView property when the ResourceUrl property is changed to or set equal to ../res/detail.png or ../res/sendtophone.png:
                XML

                    Copy


            <View x:Class="Tizen.NUI.Examples.StyleDemoPage"
  xmlns="http://tizen.org/Tizen.NUI/2018/XAML"
  xmlns:x="http://schemas.microsoft.com/winfx/2009/xaml">

  <View.XamlResources>
    <ResourceDictionary>
      <Style x:Key="CustomStyle" TargetType="ImageView">
        <Style.Triggers>
          <Trigger TargetType="ImageView" Property="ResourceUrl" Value="../res/detail.png">
            <Trigger.Setters >
              <Setter Property="PositionX" Value="200" />
            </Trigger.Setters>
          </Trigger>
          <Trigger TargetType="ImageView" Property="ResourceUrl" Value="../res/sendtophone.png">
            <Trigger.Setters >
              <Setter Property="PositionX" Value="500" />
            </Trigger.Setters>
          </Trigger>
        </Style.Triggers>
      </Style>
    </ResourceDictionary>
  </View.XamlResources>

  <ImageView Name="ImageView" Position2D="0,0" Size2D="400,400" Style="{StaticResource CustomStyle}">
    <x:Arguments>
      <x:String>../res/traffic_content.png</x:String>
    </x:Arguments>
  </ImageView>

  <PushButton Name="Click" LabelText="Click" Size2D="400,80" Position2D="1000,100" />
</View>
TargetType: The control type that the trigger applies to.Property: The property on the control that is monitored.Value: The value that occurs for the monitored property that causes the trigger to activate.Setter: A collection of Setter elements can be added when the trigger condition is met. You must specifyPropertyand setValue.
NoteThe Property for Trigger and Setter must not be same.
For more information, see Xamarin.Forms Triggers.
How to Use Transition
To load a transition, you can create transition in XAML and then use this transition in the .cs code.
Following is the format of transition in XAML:
                XML

                    Copy


            <?xml version="1.0" encoding="UTF-8" ?>
<Transition xmlns="http://tizen.org/Tizen.NUI/2018/XAML"
            xmlns:x="http://schemas.microsoft.com/winfx/2009/xaml"
            Duration="3000"
            LoopCount="3"
            EndAction="Cancel"
            Name="Type1">
  <Transition.Behaviors>
    <x:Array Type="{x:Type AnimationBehavior}">
      <AnimationBehavior Key="DestOpacity" Property="Opacity" DestValue="0.5" StartTime="0" EndTime="1000" />
      <AnimationBehavior Key="DestPosition" Property="Position" DestValue="300,100,0" StartTime="1000" EndTime="3000" />
    </x:Array>
  </Transition.Behaviors>
</Transition>
The ID for transition is Name. Every transition has an array of behavior. Each behavior defines a target. You can bind a behavior into one animatable object in the .cs code.
Following is the sample of the .cs code:
                C#

                    Copy


            Transition newAnimation = myPage.GetTransition("Type1");

PushButton button = NameScopeExtensions.FindByName<PushButton>(myPage, "Click");

if (null != button)
{
    FocusManager.Instance.SetCurrentFocusView(button);

    button.Clicked += (obj, e) =>
    {
        if (newAnimation != null)
        {
            Console.WriteLine("newAnimation.Duration: {0}", newAnimation.Duration);
            newAnimation.AnimateTo(label, "DestOpacity");
            newAnimation.AnimateTo(label, "DestPosition");
            newAnimation.Play();
        }
        return true;
    };
}
To load transition, add the following code in the XAML file of the page:
                XML

                    Copy


            <View.TransitionNames>
  <x:Array Type="{x:Type x:String}">
    <x:String>OpacityAndPositionAnimation</x:String>
    <x:String>OrientationAnimation</x:String>
  </x:Array>
</View.TransitionNames>
In the preceding example, OpacityAndPositionAnimation and OrientationAnimation are the transition names.
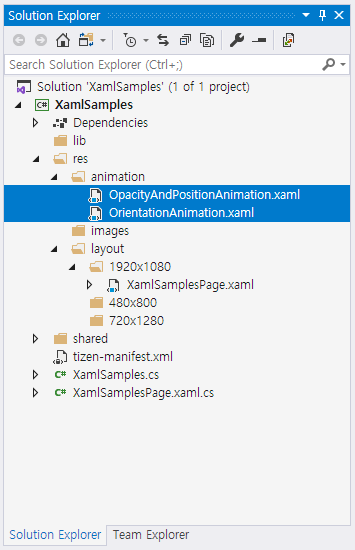
The XAML file must be placed in the res/animation folder.