ImageView
An ImageView is a NUI control that displays an image. It is implemented through the ImageView class. NUI supports different kinds of image formats, such as .jpg, .png, .bmp, .svg and .gif.
Create an ImageView
To create an image view, follow these steps:
Figure: ImageView

-
To use the
ImageViewclass, add the following namespaces:avrasmCopyxmlns:base="clr-namespace:Tizen.NUI.BaseComponents;assembly=Tizen.NUI" xmlns:comp="clr-namespace:Tizen.NUI.Components;assembly=Tizen.NUI.Components" -
It is assumed that image is in the resources directory. Create an instance of the
ImageViewclass and pass the path to image file like below:routerosCopy<base:ImageView x:Name="img" ResourceUrl="*Resource*/images/your-image.jpg"/> -
To change the image path after the instance has been created, use the
SetImage()method of theImageViewclass:C#CopyimageView = new ImageView(); imageView.SetImage(DirectoryInfo.Resource + "your-image.jpg"); Window.Instance.Add(imageView);
Manipulate an ImageView
Figure: Manipulated ImageView
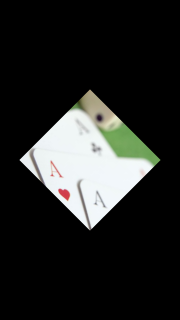
-
Create an object, set
Size2Dproperty, and display it at the center of the window by settingParentOriginandPosition2Dproperties:routerosCopy<base:ImageView x:Name="img" ResourceUrl="*Resource*/images/your-image.jpg" Size2D="400, 400" ParentOrigin="Center" Position2D="-200,-200"/> -
Use
PixelAreaproperty to apply the zoom effect:C#Copy<base:ImageView x:Name="img" ResourceUrl="*Resource*/images/your-image.jpg" PixelArea="0.25, 0.25, 0.5, 0.5" /> -
To rotate the image by 45 degrees, set the
Orientationproperty as follows:C#Copyimg.Orientation = new Rotation(new Radian((float)System.Math.PI / 4), new Vector3(0.0f, 0.0f, 1.0f));
ImageView event
After all the required resources are loaded and ready, you can perform some actions:
-
Create handler:
C#Copypublic void onResourceReady(object sender, ImageView.ResourceReadyEventArgs e) { // Resource is ready, do something } -
Add handler to
ImageViewby using theResourceReadyproperty:routerosCopy<base:ImageView x:Name="img" ResourceUrl="*Resource*/images/your-image.jpg" ResourceReady="onResourceReady"/>
ImageView properties
The following table defines the ImageView class control properties:
Table: ImageView control properties
| Property | Type | Description |
|---|---|---|
ResourceUrl |
string |
The file path of the Image. |
Image |
Map |
Property map associated with a given image. |
PreMultipliedAlpha |
bool |
The image should be opacity-adjusted. If PreMultipliedAlpha is true, the RGB components represent the color of the object or pixel, adjusted for its opacity by multiplication.If false, the opacity is ignored. |
PixelArea |
Vector4 |
Image subarea defined with relative area values: x coordinate for the top-left corner, y coordinate for the top-left corner, width, and height. To set the subarea as the whole image area, use [0.0, 0.0, 1.0, 1.0].For example, on a 200 x 200 pixel image, the value [0.25, 0.5, 0.5, 0.5] represents a subarea of that image with the following coordinates:- Top left: 50, 100 - Top right: 150, 100 - Bottom left: 50, 200 - Bottom right: 150, 200 |
Border |
Rectangle |
Image border, specified in the following order: left, right, bottom, and top. For N-Patch images only. |
BorderOnly |
bool |
Whether to draw only the borders. For N-Patch images only. |
SynchronosLoading |
bool |
Whether the image is synchronous. For N-Patch images only. |
Related information
- Dependencies
- Tizen 6.5 and Higher