Get Started with NUI XAML
XAML is a declarative markup language that is used to create UI elements, and the UI definitions are separated from the run-time logic by using C# code-behind files. The standard extension for XAML files is .xaml. Follow the instructions in the subsequent sections to get yourself familiarised with creating and using NUI XAML.
Create solution using Tizen version 5.5
You can create a new Tizen.NUI solution using Visual Studio and then you can edit your first XAML file. For more information, see Part 1. Getting Started with XAML in the XAML guide.
To create a new project, follow these steps:
-
In Visual Studio, select File > New > Project.
-
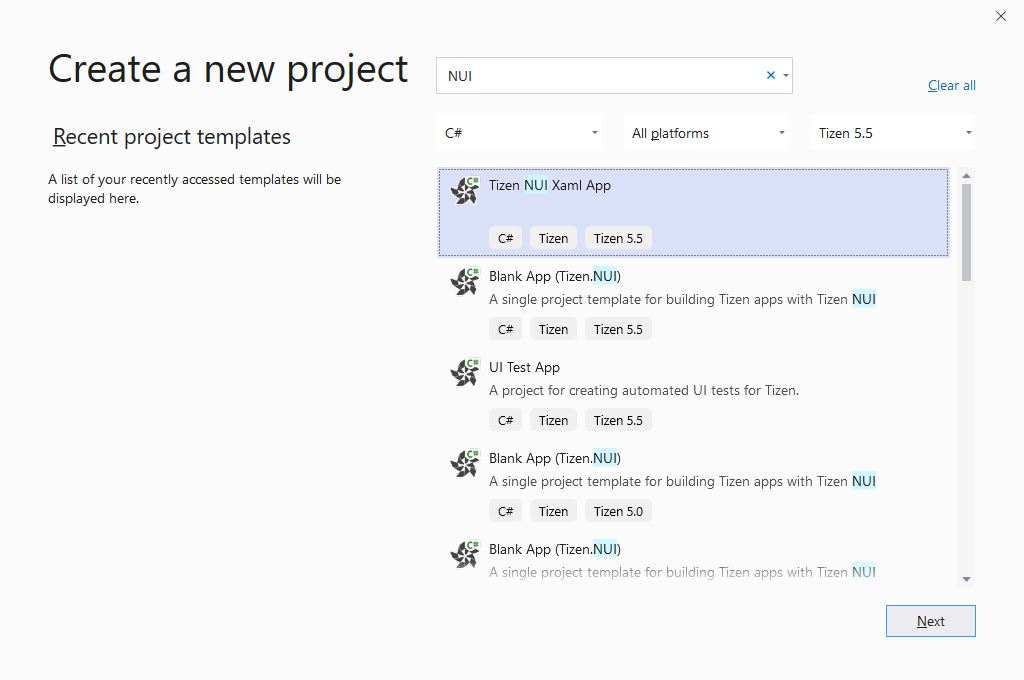
In the Create a new project dialog that appears, select C# from the All languages drop-down list.
-
In the All project types drop-down list, select Tizen 5.5.
-
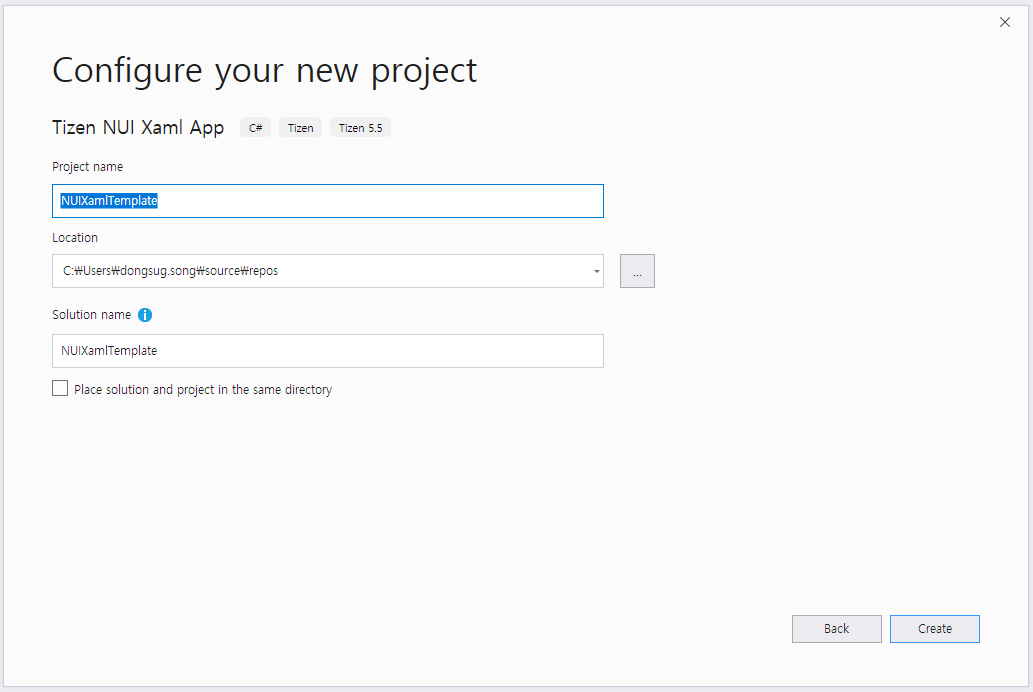
Select Tizen NUI Xaml App and click Next.
NoteIf you create a new project with Tizen NUI Xaml App template, a XAML file and a C# code-behind file are created.
Create XAML file
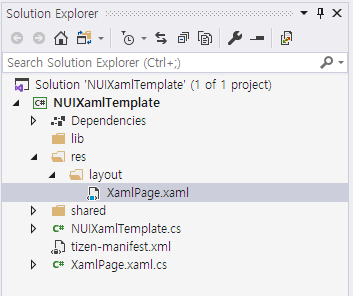
After creating the NUIXamlTemplate solution, you can see XamlPage.xaml in the /res/layout folder.
NoteIf you select other templates or work on lower version than Tizen 5.5, you have to manually create a XAML file.
If your application runs on a target having different resolutions, such as 720x1080, 480x800, or both of them then put XAML files into the corresponding folders. For example, you can create two folders: /res/layout/720x1080/ and /res/layout/480x800/. The former is the folder with a XAML file for 720x1080 resolution, and the latter is the folder with a XAML file for 480x800 resolution.
In the following sample, XamlPage.xaml is created and placed in the /res/layout/ folder:
To add any control you want, edit the XamlPage.xaml file:

XAML uses the xmlns XML attribute for namespace declarations.
This article introduces the XAML namespace syntax and demonstrates how to declare a XAML namespace to access a type.
In this sample, the TextLabel element is added, and the Text, PointSize, TextColor, and other properties are set.
For more information, see XAML Support for Tizen.NUI page.
Create C# Code-Behind file
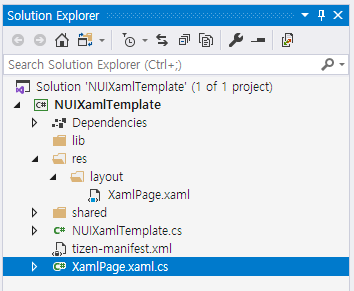
After creating the NUIXamlTemplate solution, you can see XamlPage.xaml.cs, which is a C# code-behind file associated with the XAML file in the project folder.
NoteIf you select other templates or work on lower version than Tizen 5.5, you have to manually create a C# code-behind file.
In the following sample XAML code, the x:Class attribute specifies a fully qualified class name, the XamlPage class in the NUIXamlTemplate namespace. This means that the XamlPage.xaml file of XamlPage.xaml.cs defines a new class XamlPage in the NUIXamlTemplate namespace that is derived from View:
                C#

                    Copy


            using System;
using Tizen.NUI;
using Tizen.NUI.BaseComponents;

namespace NUIXamlTemplate
{
    public partial class XamlPage : View
    {
        public XamlPage() : base()
        {
            InitializeComponent();
        }
    }
}
NoteThe name of the XAML file must be same as the class name.
Load XAML
To load layout instance using XAML, create a XamlPage instance in your code such as OnCreate() method that is invoked when the application is started:
                C#

                    Copy


            using System;
using Tizen.NUI;
using Tizen.NUI.BaseComponents;

namespace NUIXamlTemplate
{
    class Program : NUIApplication
    {
        Animation animation;
        protected override void OnCreate()
        {
            base.OnCreate();
            Window.Instance.BackgroundColor = Color.Blue;
            Window.Instance.KeyEvent += OnKeyEvent;

            XamlPage page = new XamlPage();
            page.Size = new Size(720, 1280, 0);
            Window.Instance.Add(page);

            animation = new Animation(2000);
            animation.AnimateTo(page.text, "Orientation", new Rotation(new Radian(new Degree(180.0f)), PositionAxis.X), 0, 500);
            animation.AnimateTo(page.text, "Orientation", new Rotation(new Radian(new Degree(0.0f)), PositionAxis.X), 500, 1000);
            animation.Looping = true;
            animation.Play();
        }

        public void OnKeyEvent(object sender, Window.KeyEventArgs e)
        {
            if (e.Key.State == Key.StateType.Down && (e.Key.KeyPressedName == "XF86Back" || e.Key.KeyPressedName == "Escape"))
            {
                Exit();
            }
        }

        static void Main(string[] args)
        {
            var app = new Program();
            app.Run(args);
        }
    }
}
When you compile and run this program, the TextLabel element appears on the window. Additionally, you can see the “Hello, NUI XAML APP” text, which is defined in the XAML file that rotates on the x-axis.
Create solution using Tizen version 5.0 and lower
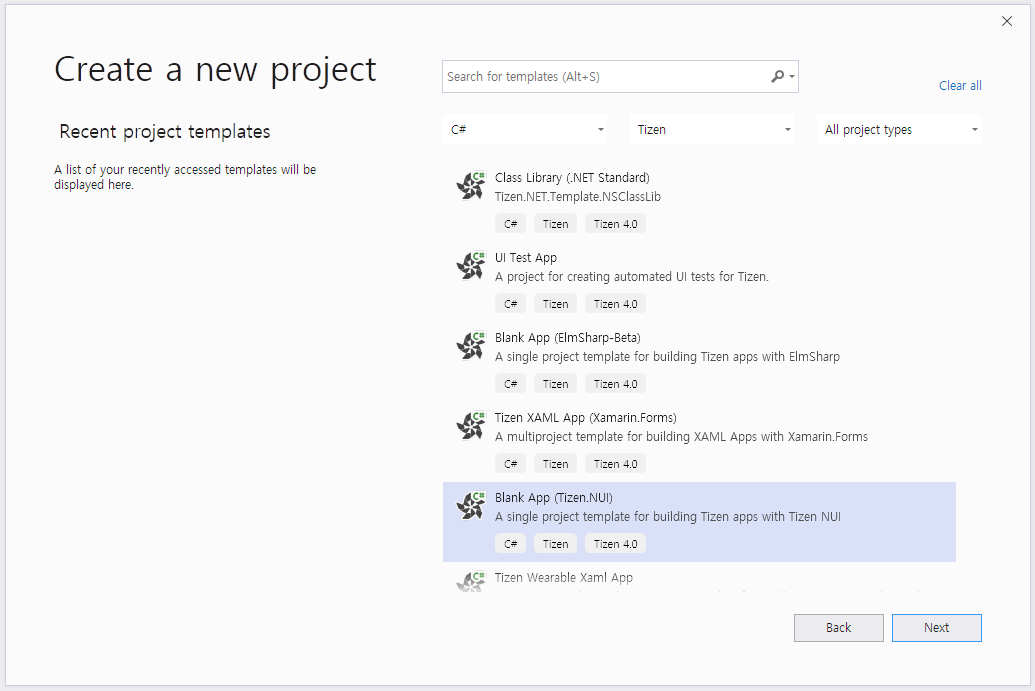
To create a new project, follow these steps:
- In Visual Studio, select File > New > Project.
- In the Create a new project dialog that appears, select C# from the All languages drop-down list.
- In the All project types drop-down list, select Tizen.
- Select Blank App (Tizen.NUI) and click Next.
Select a location for the solution and enter a name, for example, XamlSamples and click OK.
Create XAML file
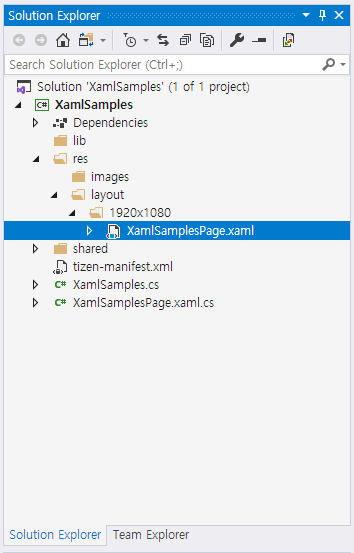
After creating the XamlSamples solution, create a XAML file. In the following sample, it is XamlSamplesPage.xaml. Place the XAML file in the /res/layout/1920x1080/ folder:
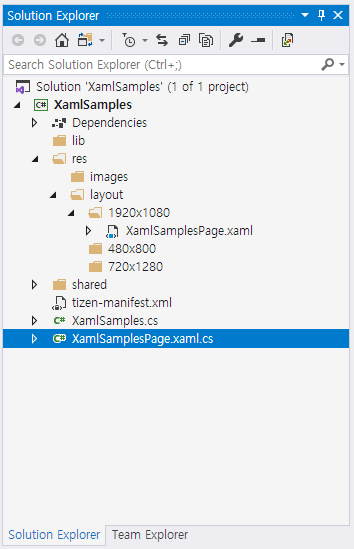
If your app runs on a target having different window sizes, such as 720x1080, 480x800, or both then put the XAML file into the corresponding folder. You can also create these folders, for example, /res/layout/720x1080/ or /res/layout/480x800/. To add any control you want, edit the XamlSamplesPage.xaml file.
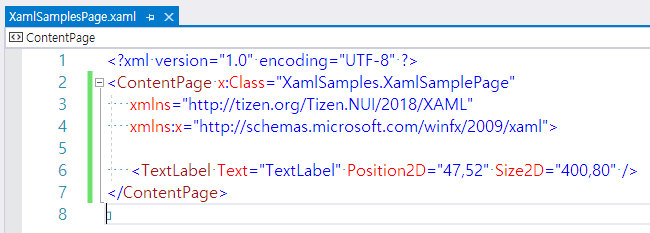
In this sample, a simple TextLabel is added, and the Text, Position2D, and Size2D properties are set.
Create C# Code-Behind File
There is a C# code-behind file associated with the XAML file. In the following sample XAML file, the x:Class attribute specifies a fully qualified class name, the XamlSamplesPage class in the XamlSamples namespace. This means that this XAML file of XamlSamplesPage.xaml.cs defines a new class named XamlSamplesPage in the XamlSamples namespace that is derived from ContentPage:
                C#

                    Copy


            using System;
using Tizen.NUI;
namespace XamlSamples
{
    public class XamlSamplesPage : ContentPage
    {
        public XamlSamplesPage (Window win) : base(win)
        {
            InitializeComponent();
        }
        protected override void Dispose(DisposeTypes type)
        {
            if (disposed)
            {
                return;
            }
            base.Dispose(type);
        }
        public override void SetFocus()
        {
            base.SetFocus();
        }
    }
}
NoteThe name of the XAML file must be same as the class name.
Load XAML
After creating the XAML and the C# code-behind files, you can load and show the visual contents that you defined in the XAML file:
                C#

                    Copy


            using System;
using Tizen.NUI;
using Tizen.NUI.Xaml;
namespace XamlSamples
{
    class Program : NUIApplication
    {
        private Window window;
        private ContentPage myPage;
        protected override void OnCreate()
        {
            base.OnCreate();
            Initialize();
        }
        void Initialize()
        {
            window = Window.Instance;
            myPage = new XamlSamplesPage(window);
            myPage.SetFocus();
        }
        static void Main(string[] args)
        {
            var app = new Program();
            app.Run(args);
        }
    }
}
When you compile and run this program, the TextLabel element will appear on the window.
For more information, see Layout Define Example.