Using Extended Web Simulator Features
The Web Simulator has several features for developing Web applications.
Basic Panel Operation
The Web Simulator provides the following panel operations:
-
Expand/Collapse
Each panel can be opened or closed by clicking the small arrow on the left side of the panel bar.
-
Reorder
Each panel can be moved and reordered by dragging the items on the drag area on the right side of the panel bar.
-
Show/Hide
Each panel can be displayed or hidden by clicking the panel-setting button on the right side of the application address bar.
Panels
The Web Simulator has the following panels which allow you to control the simulation conditions of various device aspects:
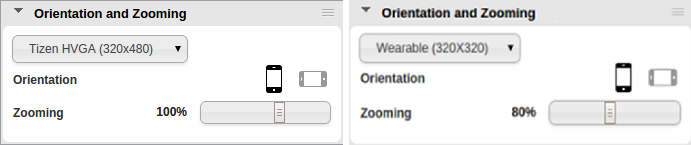
Orientation and Zooming
In the Orientation and Zooming panel, you can switch the orientation between the portrait and landscape modes. If your application has subscribed to the orientation change event, it receives the event and the subscribed event handler is invoked.
You can also set the zoom level of your application to view specific areas of the application. Zooming is a visual aid and does not trigger application notifications.
Figure: Orientation and Zooming panel (mobile app on the left, wearable on the right)
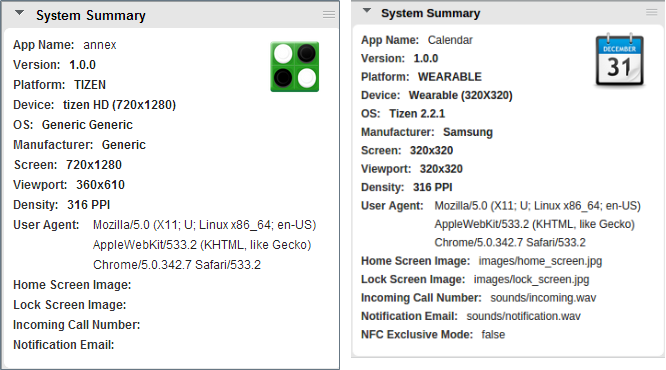
System Summary
The System Summary panel displays generic information and settings about the application, system, device, and platform.
Figure: System Summary panel (mobile app on the left, wearable on the right)
Geolocation
The Geolocation panel contains location-related settings. You can set the local time zone to test whether your application reacts properly when the target device is located in different geographical areas.
Figure: Geolocation panel
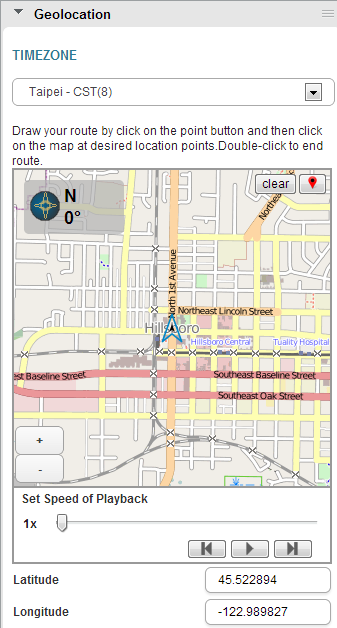
The panel also provides an input area to configure geographical data being sent from the device. Additionally, a map is displayed and updated in accordance to the changing of data.
To simulate a custom, multi-point route:
- Click the red location marker button in the upper-right corner of the map.
- Click the desired location points.
- Double-click the map to end route creation.
- To send the geolocation data to the application along the defined route, click the play button. You can also set the speed of playback.
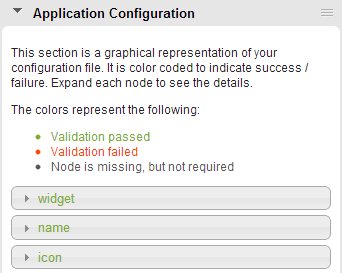
Application Configuration
The Application Configuration panel displays a graphical representation of the config.xml file. You can use it to ensure the validity of your application configuration.
For more information on the configuration details, see W3C/HTML5 Specifications.
Figure: Application Configuration panel
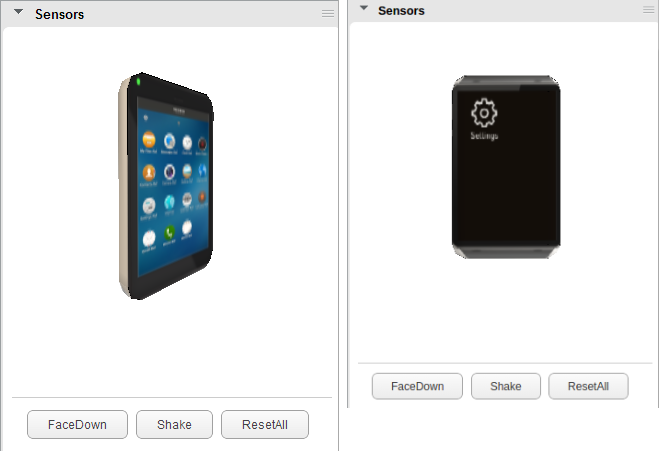
Sensors
The Sensors panel provides slide bars to configure the ambient, accelerometer, and magnetic field sensors.
To change the accelerometer value, either drag the simulator image, or enter a degree value along each axis.
The following buttons can be used to simulate the accelerometer sensor:
- FaceDown simulates placing the device with the screen facing down.
- Shake simulates shaking the device along the X axis.
- ResetAll simulates returning the device to its default position.
Figure: Accelerometer sensor (mobile app on the left, wearable on the right)
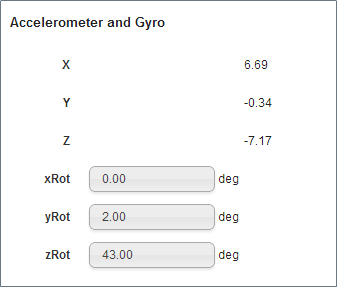
To set the magnetic field, enter the X, Y, and Z axis values.
Figure: Accelerometer and gyro sensors
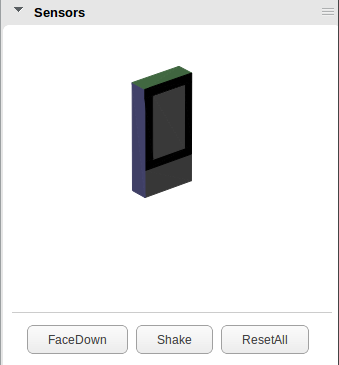
Note
If the computer does not fully support WebGL™, the simulated device in the Sensors panel looks like in the following figure.
Figure: Sensor without WebGL™
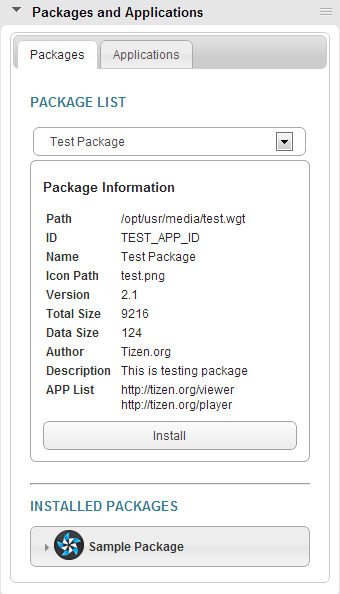
Packages and Applications
The Packages and Applications panel provides a simulated packages and applications management center on a device. It lists available and installed packages and applications on a device:
- On the Packages tab, the available packages list provides INSTALL and UPDATE operations. The operations generate events, such as INSTALLED and UPDATED, and call the required callbacks.
- On the Applications tab, the installed packages list shows the installed packages and applications on the device. You can simulate the UNINSTALL operation, which generates an UNINSTALLED event and calls the required callback.
You can use the Packages and Applications panel to verify created operations and operation details.
Figure: Packages and Applications panel
You can receive notifications of changes in the list of installed packages. The setPackageInfoEventListener() method of the PackageManager interface (in mobile, wearable, and TV applications) registers an event listener for changes in the installed packages list. To unsubscribe the listener, use the unsetPackageInfoEventListener() method. You can use the PackageInformationEventCallback interface (in mobile, wearable, and TV applications) to define listeners for receiving notifications.
Learning to receive notifications when the list of installed packages changes allows you to manage device packages from your application:
-
Define the event handlers for different notifications using the
PackageInformationEventCallbacklistener interface:var packageEventCallback = { oninstalled: function(packageInfo) { console.log('The package ' + packageInfo.name + ' is installed'); }, onupdated: function(packageInfo) { console.log('The package ' + packageInfo.name + ' is updated'); }, onuninstalled: function(packageId) { console.log('The package ' + packageId + ' is uninstalled'); } }; -
Register the listener to use the defined event handlers with the
setPackageInfoEventListener()method of thePackageManagerinterface:tizen.package.setPackageInfoEventListener(packageEventCallback); -
To stop receiving notifications, use the
unsetPackageInfoEventListener()method of thePackageManagerinterface:tizen.package.unsetPackageInfoEventListener();
Preinstalled Packages and Applications In Mobile Applications
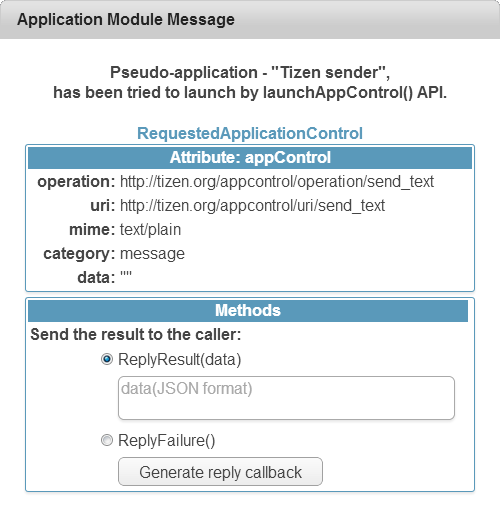
A Sample Package is preinstalled in the simulator and contains 2 sample applications: Tizen dialer for making phone calls, and Tizen sender for sending SMS messages. Many sample applications, such as CallLog, use the Tizen Application API to invoke these service applications. Since the simulator allows you to run only 1 application at a time, the Application Module Message window is available, which can provide return data for success callback and simulate application launch failure.
The following sample code demonstrates how to define an application control and invoke the http://tizen.org/appcontrol/operation/send_text service provided by the Tizen sender application. You can use the Application Module Message window to simulate the success value for the success callback or an error message for the error callback.
var appControl = new tizen.ApplicationControl('http://tizen.org/appcontrol/operation/send_text',
                                               'sms:' + phoneNumber);

tizen.application.launchAppControl(appControl, null, function() {
    console.log('launch app service ...');
}, function(e) {/* Error handling */},
{
    onsuccess: function() {
        console.log('Message service launch success');
    },
    onfailure: function(er) {/* Error handling */}
});
Figure: Providing application callback data
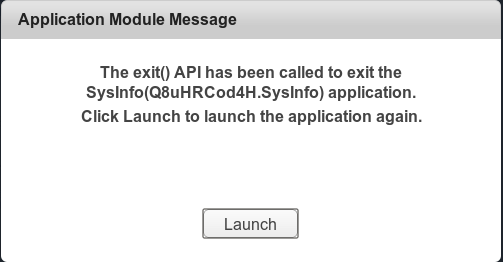
The Web Simulator does not have a home screen. Therefore, when the application.exit() method is called, you cannot navigate to another application or to the home screen. In this situation, a message is displayed stating that the application tried to exit and can be launched again.
Figure: Launch an application again
Communications in Mobile Applications
In the Communications panel, you can handle calls, messages, and the push service.
Calls
The Calls tab provides controls for simulating incoming calls made to the application. The calls can be tracked by call history-related methods using the Tizen Call History API.
Figure: Calls tab
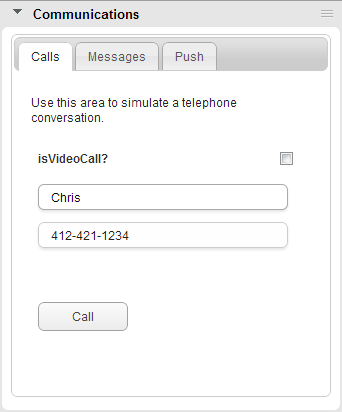
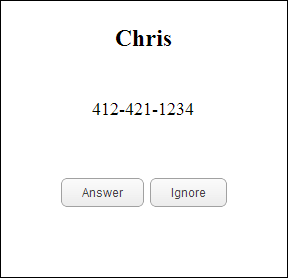
Click Call to display the calling screen. Click Answer to simulate a received call, and Ignore to simulate a rejected call.
Figure: Calling screen
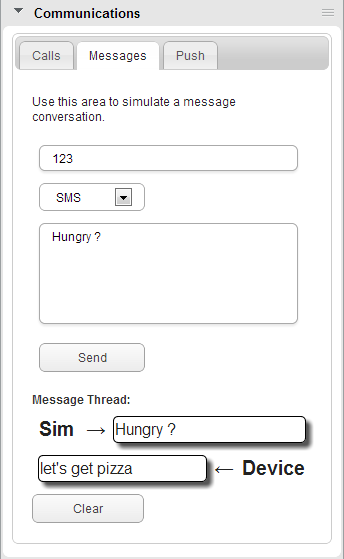
Messages
The Messages tab provides controls for simulating SMS, MMS, and email message exchange between the panel and a target application. To send a message from the panel to the application:
- Enter the sender name and message body.
- Select the message type.
- Click Send.
The application receives messages using the Tizen Messaging API.
The Message Thread section shows the message history of the current session.
Figure: Messages tab
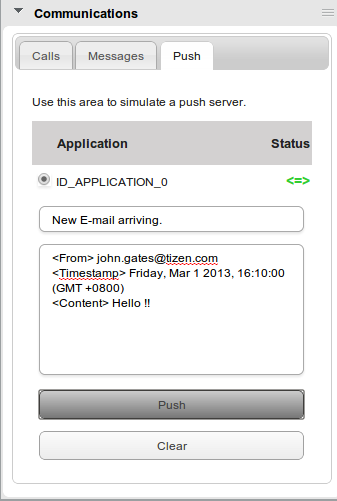
Push Service
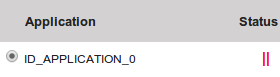
The Push tab provides controls for delivering push notifications to your application. The applications table (on the Packages and Applications panel) lists registered applications for receiving push notifications and connectivity status. If an application is connected, the push service sends the push notification data directly to the application. If an application is not connected, the push service posts a UI notification on the Notification panel.
For the application to receive push messages, it has to register itself with the tizen.push.registerService() method. If the registration is successful, a red pause button is shown at the Application section under Status. During this status, notification messages pushed by the service server are posted on the Notification panel.
Figure: Registered for the push service
After the registration, the application must connect to the push service with the tizen.push.connectService() method. When the application is connected, a callback provided by the application is called whenever a notification message arrives.
Figure: Connected to the push service

To push a message from the panel to the application:
- Select the target application on the Packages and Applications panel.
- Enter the alert message and application data.
- Click Push.
The application receives push notifications using the Tizen Push API.
Figure: Push tab
Network Management in Mobile Applications
The Network Management panel is used to manage network capabilities, such as Wi-Fi, cellular network (2G, 3G, and 4G), NFC, Bluetooth, and bearer selection.
Figure: Network Management panel
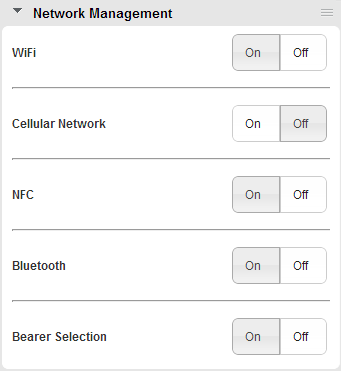
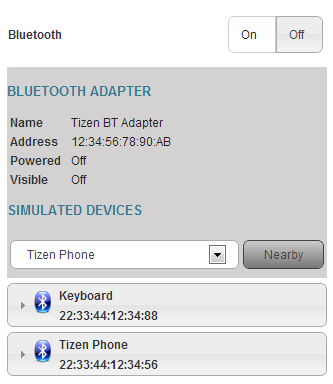
You can also set additional parameters for the NFC and Bluetooth functionalities, such as NFC tag and target type, Bluetooth adapter information, and the simulated devices.
Figure: NFC parameters
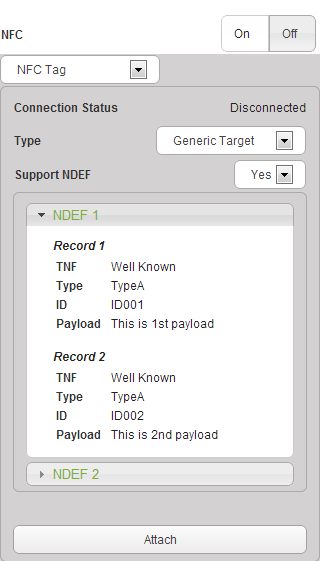
Figure: Bluetooth parameters
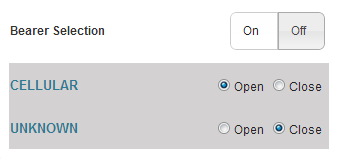
The Bearer Selection section provides network bearer selection management by listing supported network devices and their current availability status. You can request and release specific network connections from this section.
Figure: Network bearer selection
Your application can manage network devices and network status using the Tizen NFC, Bluetooth, and Network Bearer Selection APIs.
Power Manager in Mobile Applications
The Power Manager panel provides controls for managing the state of the battery and power resources.
Figure: Power Manager panel
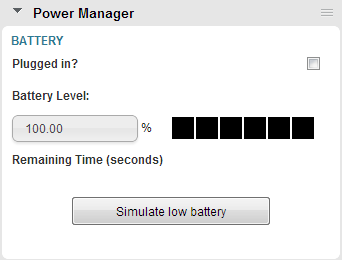
The BATTERY section simulates the device battery level. Your application can retrieve the current battery status using the Tizen System Information API.
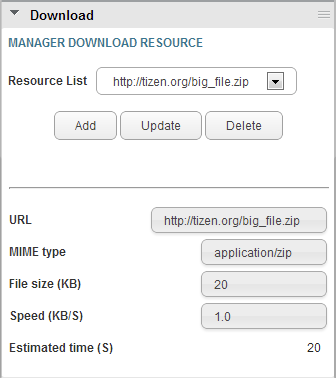
Download in Mobile Applications
The Download panel allows you to create a simulated download object with custom size, MIME type, and download speed. All simulated download objects support start, cancel, pause, and resume operations, and provide status feedback mechanism. You can use the simulated download object created by the panel to test various conditions for your application.
The panel contains 2 predefined simulated download objects: http://tizen.org/small_file.zip and http://tizen.org/big_file.zip. When an object is selected from the drop-down list, its details are displayed at the bottom half of the panel. The panel also allows you to add, remove, and update download objects. Details, such as URL, MIME type, file size, and speed, are configurable.
The following sample code demonstrates how to start the download process and set a listener callback to monitor the status of the download. By adjusting the parameter of the download object, you can verify that you application behaves correctly in different scenarios.
request = tizen.DownloadRequest('http://tizen.org/small_file.zip');
downloadId = tizen.download.start(request);
tizen.download.setListener(downloadId, listener);
Figure: Download panel
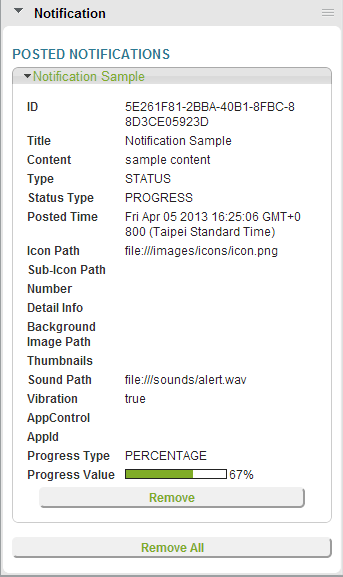
Notification in Mobile Applications
The Notification panel provides a notification center administrating system notifications. As the Simulator has no real desktop UI components, such as status bar or notification tray, the panel serves as the final rendering place of all the notifications. You can easily verify that the notification details you created with the Tizen Notification API are correct.
Figure: Notification panel with empty notification

The following sample code demonstrates how to create a status notification. When it is posted with the post() method, the details of the notification are displayed on the panel, as shown in the figure below.
notification = new tizen.StatusNotification('PROGRESS', 'Notification Sample', {
    content: 'sample content',
    iconPath: file:///images/icons/icon.png,
    soundPath: file:///sounds/alert.wav,
    vibration: true,
    progressValue: 67
});
Figure: Notification panel with a notification
Related Information
- Dependencies
- Tizen Studio 1.0 and Higher