Create Your First Tizen IoT Native Service Application
Welcome to Tizen IoT Native Service Application development!
NoteService applications are Tizen native applications, which run in the background with no graphical user interface. These applications can be very useful for activities, such as getting sensor data in the background that needs to run periodically or continuously but does not require any user interaction.
An IoT native service application can be created using the C language and run on Raspberry Pi. The application uses the native APIs, which provide various interfaces to the device hardware allowing you to take advantage of numerous capabilities tailored to run with limited device resources.
Study the following instructions to help familiarize yourself with the Tizen Native application development process as well as using Tizen Studio and deploying the created application on Raspberry Pi. With the instructions, you can create and run a basic IoT native service application, which displays some text on the log with no user interaction:
-
Before you get started with developing Tizen applications on Raspberry Pi, you must set up your development environment with the board.
For more information on setting up the development environment with the board, see the following:
-
Download and install Tizen Studio.
For more information on the installation process, see the installation guide.
-
Create an IoT native service project using Tizen Studio.
This step shows how to use a pre-designed template that creates all the basic files and folders required for your project.
-
This step shows how to build your own application by validating and compiling your codes.
-
This step shows how to run your application on Raspberry Pi.
When you are developing a more complex application, you can take advantage of the native tools included in Tizen Studio to ease the tasks of creating functionality and designing the application UI.
Create project
The following example shows you how to create and configure a basic IoT native service application project in Tizen Studio. An application project contains all the files that make up an application.
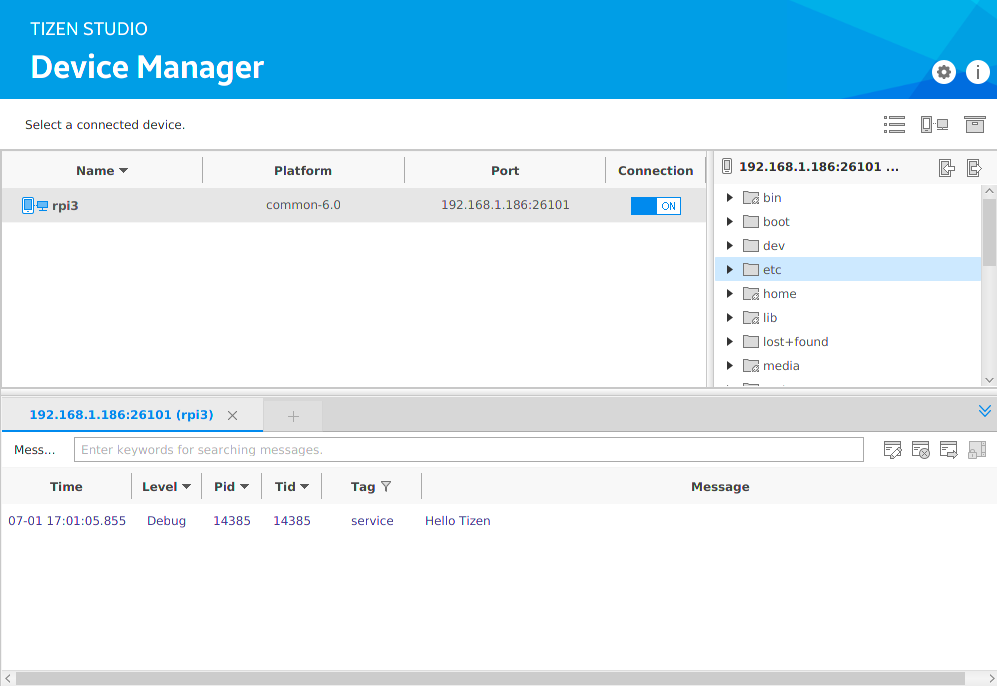
The following figure illustrates the running result of the example application to be created. You can see the text log of the application (Hello Tizen) with no user interaction:
Figure: Log of the IoT native service application
To create the application project:
-
Launch Tizen Studio.
-
In the Tizen Studio menu, select File > New > Tizen Project.

The Project Wizard opens.
-
In the Project Wizard, define the project details.
The Project Wizard helps you to create a basic application skeleton with the predefined folder structure and mandatory files. You can easily create various applications by selecting an application template or sample to use in the Project Wizard.
-
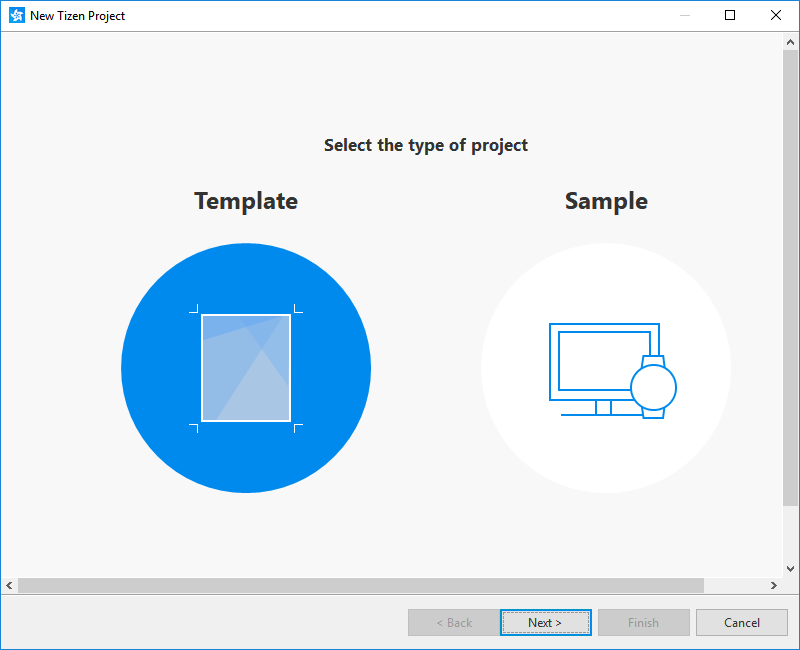
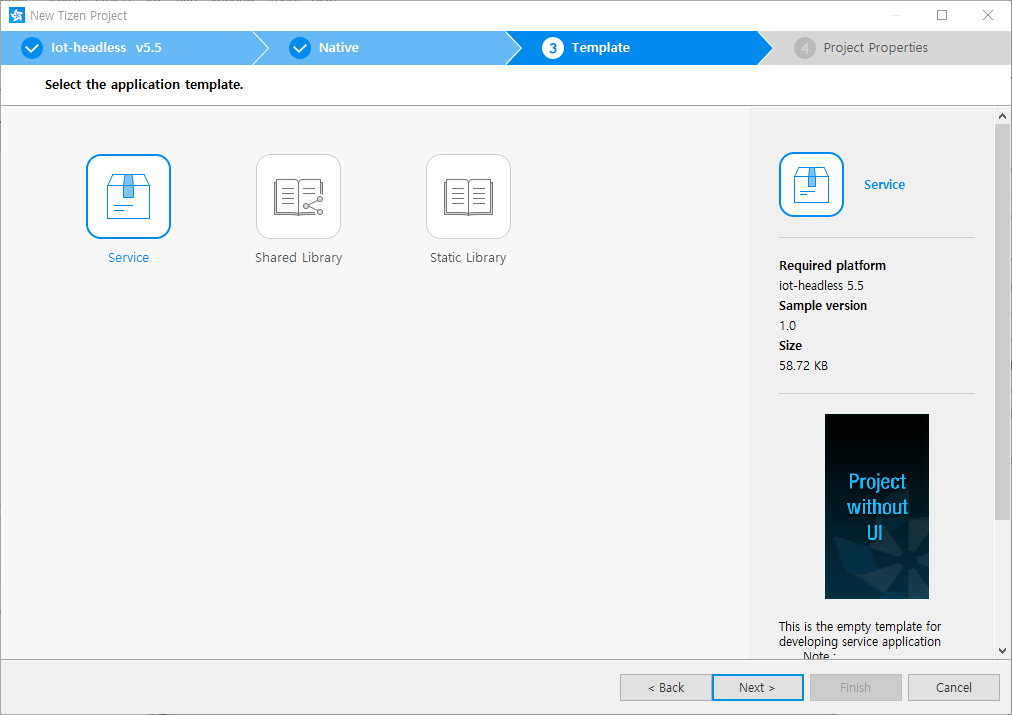
Select the Template project type, and click Next.
-
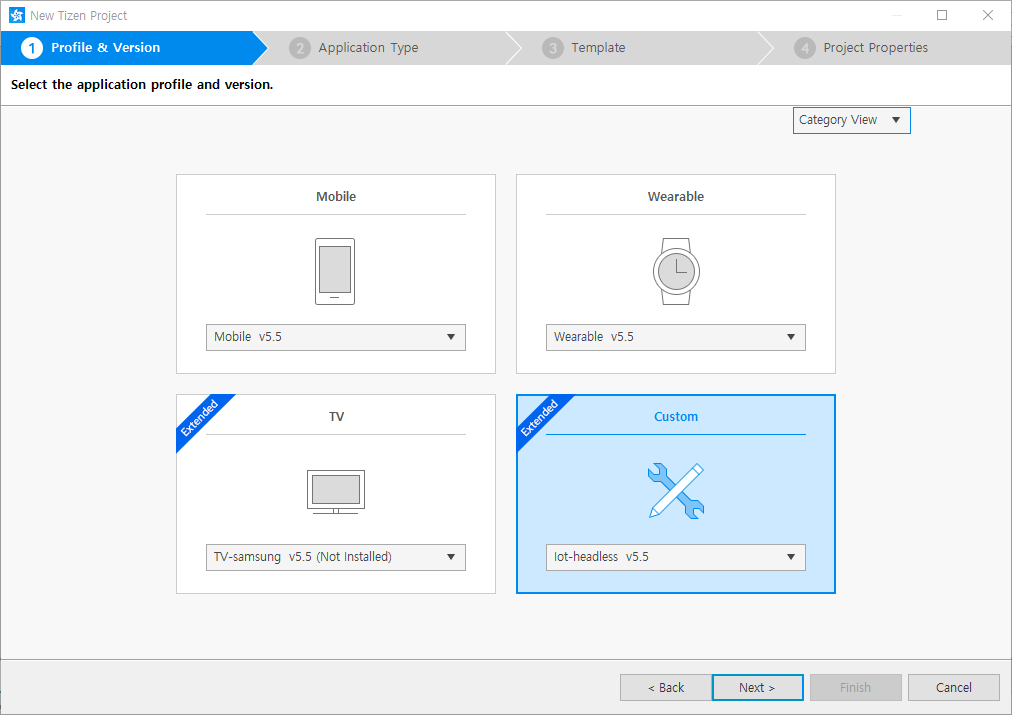
Select the profile (Iot-headed or Iot-headless) and version from a drop-down list, and click Next.
The version depends on the platform version you have installed and with which you are developing the application.
-
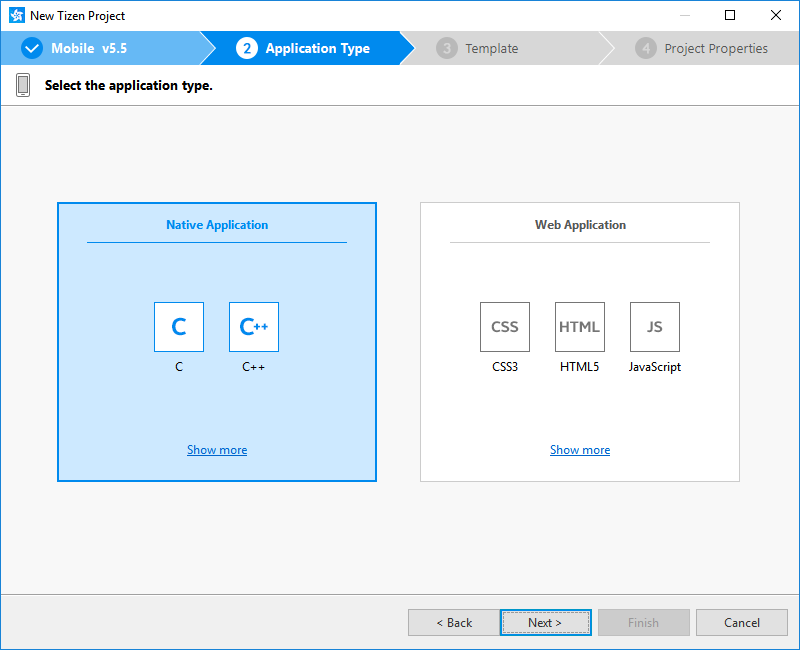
Select the Native Application application type, and click Next.
-
Select the Service template, and click Next.
-
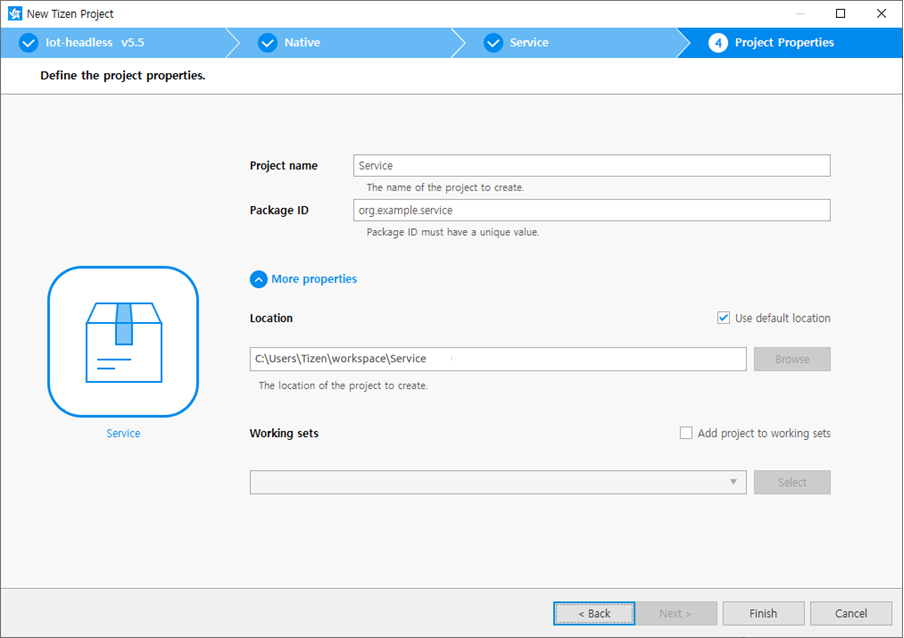
Define the project properties, and click Finish.
You can enter a project name (3-50 characters) and a unique package ID. You also can select the location and working sets by clicking More properties.
The Project Wizard sets up the project and creates application files using the default content from the template. For more information on the Project Wizard and available templates, see Creating Tizen Projects with Tizen Project Wizard.
-
You can see the created project in the Project Explorer view. The most important files and folders include:
-
inc: Folder for included source files -
res: folders for resource file used only within the application -
shared: Folder for resource files to be shared with other applications -
src: Folder for source code files -
lib: Folder for external library files -
tizen-manifest.xml: Manifest file used by the platform to install and launch the application
Figure: The folder structure of the application in the Project Explorer

NoteYou can view and modify the application configuration in the manifest editor. In this example, no change in the configuration is required.
Your application project is now ready for further action.
Manage application configuration
To view and modify the application configuration:
-
In the Project Explorer view, double-click the
tizen-manifest.xmlfile of the application to open the manifest editor. -
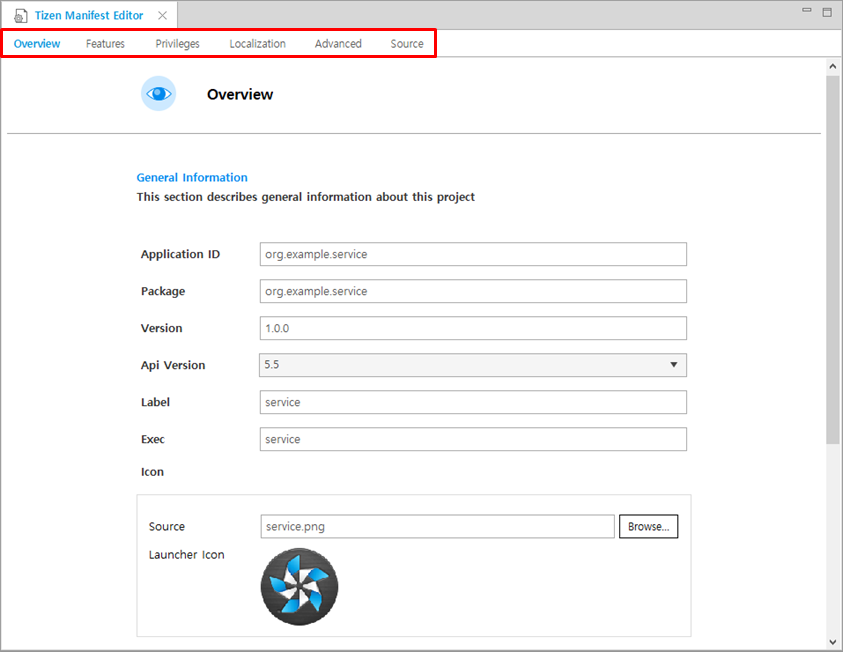
In the manifest editor, view and modify the configuration details using various tabs:
-
Overview: Define general information, such as the package, label, and icon of the application.
-
Features: Define required software and hardware features. This information is used for application filtering in the official site for Tizen applications.
-
Privileges: Define privileges for the security-sensitive APIs or API groups accessed and used by the application.
-
Localization: Define localized values for the application label, description, and icon.
-
Advanced: Define advanced features, such as application metadata, data control for services, application control functionalities, and account details.
-
Source: View and edit the source code of the
tizen-manifest.xmlfile. Changes made and saved on the other tabs are reflected in the source code and vice versa.Note
The
tizen-manifest.xmlfile must conform to both the XML file format and the Tizen Native application specification requirements. Editing the file in the Source tab is intended for advanced users only.
-
-
To save any changes, select File > Save All in the Tizen Studio menu.
For more information on configuring the application, see Setting the Application Manifest.
Understand source code
Pay attention to the life-cycle callbacks in the application source code to understand how the application works.
The main() function in the src/service.c file is used to register callbacks that manage specific parts of the application life-cycle:
service_app_create- Called when the application process starts.
service_app_terminate- Called while the application process is terminating.
- Called after the main loop quits.
service_app_control- Called after the
service_app_createcallback when the process starts. - Called when a launch request is received while the process is running.
- Can receive
service_app_controldata (parameters for launching the application). - Used to implement parameter-specific actions of the application.
- Called after the
int
main(int argc, char *argv[])
{
    char ad[50] = {0,};
    service_app_lifecycle_callback_s event_callback;
    app_event_handler_h handlers[5] = {NULL, };

    event_callback.create = service_app_create;
    event_callback.terminate = service_app_terminate;
    event_callback.app_control = service_app_control;

    return service_app_main(argc, argv, &event_callback, ad);
}
Add log
You can print logs using the Dlog API in the Tizen native application. For more information on Dlog, see Dlog API.
In this example, to confirm that the IoT native service application has been launched successfully, add the Hello Tizen as a debug log.
You can add the debug log as follows:
-
Confirm that
<dlog.h>is included, and LOG_TAG is defined ininc/service.h. LOG_TAG can be changed as you want:#include <dlog.h> #ifdef LOG_TAG #undef LOG_TAG #endif #define LOG_TAG "service" -
To print the sentence you want, use
dlog_print()in theservice_app_create():bool service_app_create(void *data) { dlog_print(DLOG_DEBUG, LOG_TAG, "Hello Tizen"); return true; }
Build your application
When your application code is ready, you may build the application. The building process performs a validation check and compiles your codes.
You can build the application automatically or manually:
-
Automatically
The automatic build means that Tizen Studio automatically rebuilds the application whenever you change a source or resource file and saves the application project.
To use the automatic build:
-
Select the project in the Project Explorer view.
-
In the Tizen Studio menu, select Project > Build Automatically.
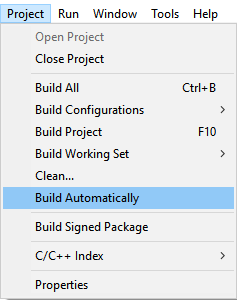
A check mark appears next to the menu option.
You can toggle the automatic build on and off by selecting Project > Build Automatically.
-
-
Manually
The manual build means that you determine yourself when the application gets built.
To manually build the application, right-click the project in the Project Explorer view and select Build Project.
Figure: Manually building the application
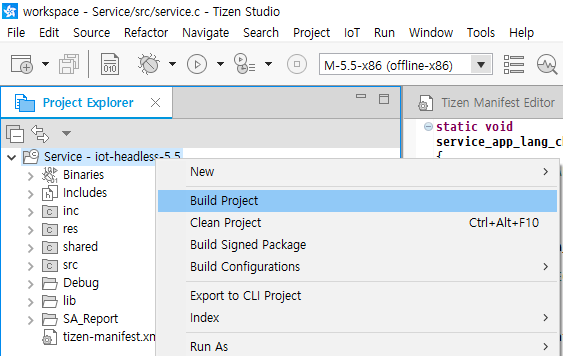
Alternatively, you can also select the project in the Project Explorer view and do one of the following:
- In the Tizen Studio menu, select Project > Build Project.
- Press the F10 key.
There are more than one build configurations. To see the currently active configuration or change it, right-click the project in the Project Explorer view and select Build Configurations > Set Active. The default configuration is Debug. For more information, see Building Applications.
After you have built the application, run it.
Run your application
You can run the application on Raspberry Pi.
Run on Raspberry Pi
To run the application on a Raspberry Pi:
-
Set the Wi-Fi of Raspberry Pi.
Note
The Wi-Fi of the PC with the Tizen Studio installed and Raspberry Pi must be on the same local network.
-
Generate an author certificate.
Before you run the application, you must sign your application package with a certificate profile in Tizen Studio.
-
Run the application:
-
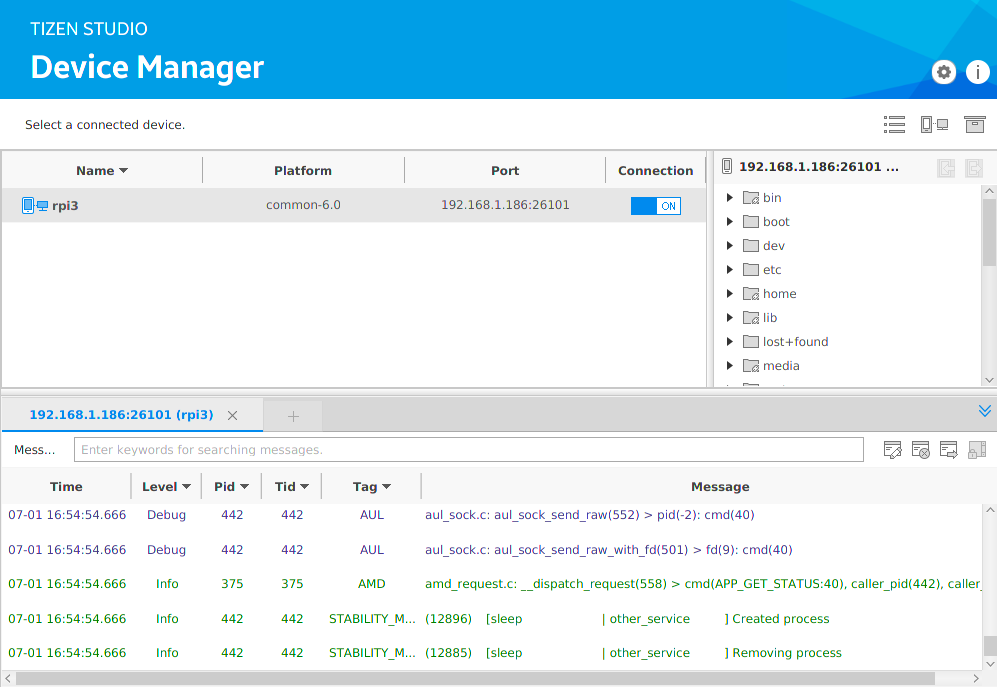
In the Tools > Device Manager, select Raspberry Pi and change the connection status to ON.
-
In Project Explorer view, right-click the project and select Run As > Tizen Native Application.
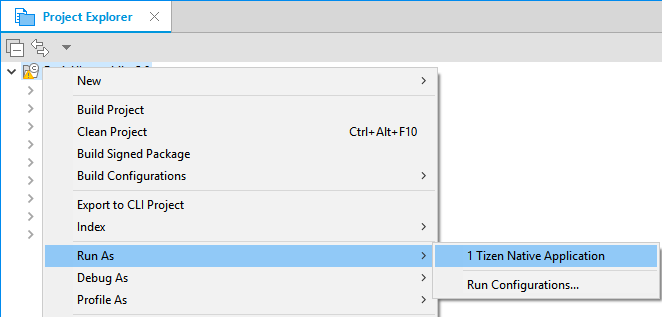
Alternatively, you can also select the project in the Project Explorer view and do one of the following:
- Press the Ctrl + F11 key.
- Click the run icon in the toolbar.
If you have more than one connected device, select the device from the combo box in the toolbar before selecting to run the application.
-
See logs to confirm if the application launches successfully on Raspberry Pi.
For more information on the Log View, see the checking Logs with Log View.
Note
The application is launched using the default debug run configuration. To create and use another configuration:
- In the
Project Explorerview, right-click the project and selectRun As > Run Configurations. - In the
Run Configurationswindow, click theNew Launch Configurationicon ( ), define the configuration details, and launch the application by clicking
 Run.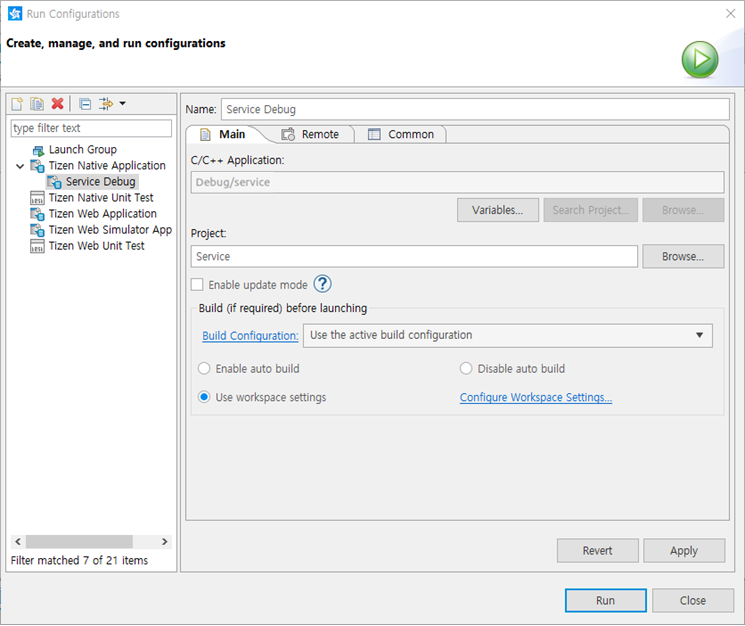
-