Elementary Animations
Elementary animations allow you to apply various transition effects, such as translation and rotation, to Evas objects. Elementary animations are mostly based on Ecore animators, but provide some transition methods at a higher abstraction level. Elementary animations provide a simpler way of animating objects than Ecore animators or Edje animations.
Use Elementary animations only when Edje animations are not sufficient. Edje animations are better at handling transitions, have more flexibility, and can be manipulated inside themes. The only drawback is that Edje animations have their own definition language (the EDC files). If you want to code with the C language, use Elementary animations.
Elementary animations are based on the Elm_Transit object, which stores all the information related to the transition effects to be used, the affected objects (you can perform transitions on 1 or more objects), and the animation details (such as the duration and number of repetitions). To use Elementary animations, you must create an Elm_Transit object and define the desired transitions using the object functions. After the transitions are registered, they are automatically managed: their callback functions are called for the set duration, and they are deleted upon completion.
To create a transition, build the Elm_Transit object using the elm_transit_add() function, define an Evas object to be animated, and add transition type effects and properties. The created transit object starts playing as soon as the application enters the main loop.
Elm_Transit *transit = elm_transit_add();
/* Define Evas object to be animated */
/* Add effects and properties */

/* Start the transition */
elm_transit_go(transit);
Managing Transition Objects
To manage the objects on which the transition is performed:
-
To add your Evas objects to a transition, use the
elm_transit_object_add()function. The first parameter is theElm_Transitinstance and the second is the Evas object to animate.Note
The Evas object can be a low-level component, such as a rectangle, but also a UI component, such as a button, image, or calendar.
To animate an Evas object handled by a container, such as a box, you need to either unpack the object before the animation or animate the whole container.
-
To determine on which objects the transition is performed (which objects have been added to the transition), use the
elm_transit_objects_get()function to retrieve a list of objects. -
To remove objects from the transition, use the
elm_transit_object_remove()function. The first parameter is theElm_Transitinstance and the second is the Evas object to remove.Note
After you have added at least 1 Evas object to your transition, the transition is automatically deleted when the object list becomes empty (either because the translation has been terminated or all objects have been deleted).
Otherwise, you have to delete the transition manually using the
elm_transit_del()function. If you delete theElm_Transitinstance while the transition is running, the transition stops.
Elm_Transit *transit = elm_transit_add();
/* Add an object */
elm_transit_object_add(transit, obj);

/* Retrieve list of added objects */
elm_transit_objects_get(transit);

/* Remove the object */
/* If this is the only object, the transition is deleted automatically */
elm_transit_object remove(transit, obj);

/* If there are other objects, delete the transition manually */
elm_transit_del(transit);
Using Images in a Transition
You can animate images in 2 ways: you can manage the UI components which have the images, or you can add the images to an Elementary transition and animate them as Evas objects.
To add images to a transition:
- Create an Eina list and add the paths of the images you want to animate to the list.
- Add the image list to the transition with the
elm_transit_effect_image_animation_add()function. - Define the image transitions the same way as any other object transitions.
Note
This list and its contents are deleted after the
Elm_Transitobject ends the transition effect.
char buf[PATH_MAX];
Eina_List *images = NULL;
Elm_Transit *transit = elm_transit_add();
snprintf(buf, sizeof(buf), "%s/images/btn_default.png", PACKAGE_DATA_DIR);
images = eina_list_append(images, eina_stringshare_add(buf));
snprintf(buf, sizeof(buf), "%s/images/btn_hover.png", PACKAGE_DATA_DIR);
images = eina_list_append(images, eina_stringshare_add(buf));
elm_transit_effect_image_animation_add(transit, images);

/* Define the transition type and properties */
Controlling the Transition Properties
You can control the duration, timeline, acceleration, repeat, and auto-reverse properties of the transition.
Duration
You must set the transition duration for the Elm_Transit object.
To manage the duration:
-
To set the duration, use the
elm_transit_duration_set()function. The first parameter is theElm_Transitinstance and the second is the duration in seconds.Note
The purpose of the
Elm_Transitobject is to abstract the low-level details of object interpolation, so you cannot create an infinite transition by specifying the duration. However, you can make your transition last forever using the repeat function.The following example shows how to make a complete revolution of the target Evas object in 2 seconds:
Elm_Transit *transit = elm_transit_add(); elm_transit_object_add(transit, my_evas_object); /* Set a 360 degree rotation as the transition type */ elm_transit_effect_rotation_add(transit, 0.0, 360); /* Set the duration */ elm_transit_duration_set(transit, 2.0); elm_transit_go(transit); -
To get the transition duration, use the
elm_transit_duration_get()function.
Timeline
To manage the timeline:
- After you have defined all the properties that define your transition, start the transition with the
elm_transit_go()function. - You can maintain full control over the execution process even after the transition has started. You can pause the transition by setting the paused parameter of the
elm_transit_paused_set()function toEINA_TRUE. You can resume the transition with the same function by setting the paused parameter toEINA_FALSE. - To determine whether the transition is currently paused, use the
elm_transit_paused_get()function. - You can remain informed about the present transition flow and get the current frame with the
elm_transit_progress_value_get()function. This function returns the timeline position of the animation, ranging between 0.0 (start) and 1.0 (end).
elm_transit_go(transit);
/* Pause */
elm_transit_paused_set(transit, EINA_TRUE);
/* Resume */
elm_transit_paused_set(transit, EINA_FALSE);
/* Get the timeline position */
elm_transit_progress_value_get(transit);
Acceleration
You can control the acceleration (tween) mode of the animation. The Elm_Transit object supports a number of built-in interpolation methods, which provide different acceleration modes. By default, all interpolations are linear.
To manage the tween mode:
-
To change the tween mode, use the
elm_transit_tween_mode_set()function. The first parameter is theElm_Transitinstance and the second is the tween mode of the transition, which is defined by theElm_Transit_Tween_Modeenumeration.elm_transit_tween_mode_set(transit, ELM_TRANSIT_TWEEN_MODE_LINEAR); -
To get the current tween mode, use the
elm_transit_tween_mode_get()function.
Repeat
To manage the repeat property:
-
To set a transition to repeat, use the
elm_transit_repeat_times_set()function. The first parameter is theElm_Transitinstance and the second is the number of times the transition is repeated.Note
If the
repeatparameter is set to 0, the transition does not loop at all. If set to 1, the transition runs twice. If set to a negative value, the transition repeats forever.The following example shows how to make an Evas object spin for 3 complete revolutions in 6 seconds:
Elm_Transit *transit = elm_transit_add(); elm_transit_object_add(transit, my_evas_object); /* Set a 360 degree rotation as the transition type */ elm_transit_effect_rotation_add(transit, 0.0, 360); /* Set the duration of one rotation to 2 seconds */ elm_transit_duration_set(transit, 2.0); /* Set the number of repeats to 3 */ elm_transit_repeat_set(transit, 3.0); elm_transit_go(transit); -
To get the repeat value, use the
elm_transit_repeat_times_get()function. The default value is 0.
Auto-reverse
To manage the auto-reverse property:
-
To automatically reverse the transition once it finishes, use the
elm_transit_auto_reverse_set()function. The first parameter is theElm_Transitinstance and the second is the reverse state. If the reverse state is set toEINA_TRUE, the function performs the same transition backwards as soon as the first transition is complete.Note
Reversing the transition doubles the duration of the transition. Moreover, if the transition is set to repeat, the transition runs back and forth until the repeat count is finished.
If both the auto-reverse and repeat properties are set, the total duration is: 2 * <duration> * <repeat>.
The following example shows how to make an object perform half a turn and then reverse the animation to its original position in 4 seconds:
Elm_Transit *transit = elm_transit_add(); elm_transit_object_add(transit, my_evas_object); /* Set a 360 degree rotation as the transition type */ elm_transit_effect_rotation_add(transit, 0.0, 360); /* Set the duration of one rotation to 2 seconds */ elm_transit_duration_set(transit, 2.0); /* Set the auto-reverse on */ elm_transit_auto_reverse_set(transit, EINA_TRUE); elm_transit_go(transit); -
To determine whether the auto-reverse mode is enabled, use the
elm_transit_auto_reverse_get()function.
Handling Transition Types
There are 2 main transition types:
- Transitions that are applied to the object properties, such as position, size, angle, and color.
- Transitions from one object to another, where the first object is hidden to let the second one appear.
All transitions are based on the same principle: first set the start and the end values for the properties to animate, then define the lifespan of the animation, and finally settle the preferred interpolation method (such as linear, acceleration, or bounce).
You must declare the transitions after the parent window has been created, since the transition effects make use of the geometric properties of the parent window. If the parent window does not yet exist when calculating the interpolation, the interpolation can be created based on the wrong information.
The Elm_Transit object provides several built-in transition definitions that are useful for the most common cases, so you do not have to code them from scratch. The following list defines how you can add different transition type effects to the Elm_Transit instance. To delete an added effect, use the elm_transit_effect_del() function.
To add effects for different transition types:
-
Translation
To perform a translation on an Evas object (move it from one position to another), use the
elm_transit_effect_translation_add()function.The following example shows how to slide an Evas object (a rectangle) on a diagonal line from the top-left corner of the screen 280 pixels down and right. The transition uses a constant speed and happens in 1 second.
Elm_Transit *transit = elm_transit_add(); elm_transit_object_add(transit, rectangle); elm_transit_effect_translation_add(transit, 0, 0, 280, 280); elm_transit_duration_set(transit, 1); elm_transit_go(transit); -
Color transition
Color transitions allow you to dynamically change the color of Evas objects using the
elm_transit_effect_color_add()function. You can also control the opacity of the color (the background of the object, not the object itself) through an alpha channel parameter.The following example shows how to change a rectangle from red to blue in 3 seconds:
Elm_Transit *transit = elm_transit_add(); elm_transit_object_add(transit, rectangle); elm_transit_effect_color_add(transit, /* Target object */ 255, 0, 0, 255, /* From color, with alpha channel 255 */ 0, 0, 255, 255); /* To color, with alpha channel 255 */ elm_transit_duration_set(transit, 3); elm_transit_go(transit); -
Rotation
To implement a rotation transition on any Evas object, use the
elm_transit_effect_rotation_add()function. The function defines the start and end angles of the rotation.If you apply a rotation on multiple objects, they individually mill around and do not act as a group. If you want several objects to revolve around a common point, you must encapsulate the objects into a single parent object and apply the rotation to the parent object, as shown in the following example:
/* Parent container */ Evas_Object *parent = elm_box_add(my_window); evas_object_show(parent); elm_box_horizontal_set(parent, EINA_TRUE); elm_box_homogeneous_set(parent, EINA_TRUE); /* Button 1 */ Evas_Object *btn1 = elm_button_add(parent); elm_object_text_set(btn1, "Btn1"); elm_box_pack_start(parent, btn1); evas_object_show(btn1); /* Button 2 */ Evas_Object *btn2 = elm_button_add(parent); elm_object_text_set(btn2, "Btn2"); elm_box_pack_end(parent, btn2); evas_object_show(btn2); /* Make the parent container do a 360-degree spin in 2 seconds */ Elm_Transit *transit = elm_transit_add(); elm_transit_object_add(transit, parent); elm_transit_effect_rotation_add(transit, 0.0, 360); elm_transit_duration_set(transit, 2.0); elm_transit_go(transit); -
Wipe effect
The wipe effect is designed to dynamically hide or show any element on the scene using the
elm_transit_effect_wipe_add()function.The following example shows how to make an object disappear progressively from left to right in 2 seconds:
Elm_Transit *transit = elm_transit_add(); elm_transit_object_add(transit, my_evas_object); elm_transit_effect_wipe_add(transit, ELM_TRANSIT_EFFECT_TYPE_HIDE, ELM_TRANSIT_EFFECT_WIPE_DIR_RIGHT); elm_transit_duration_set(transit, 2.0); elm_transit_go(transit); -
Zoom effect
To implement a zoom effect, use the
elm_transit_effect_zoom_add()function. The function defines the size of the object at the start and end of the animation. The start size is defined as the scale of the object, with the value 1 representing the initial scale of the object. The end size is defined based on the start size, so that the value 2 means that the object size (height and width) is doubled.The zoom effect does not change the width and height ratio of the object. To customize the zoom effect on the width and height attributes, use the resizing effect described below.
The following example shows how to implement a zoom-out transition. At the end of the 2-second transition, the animated object is half its original size.
Elm_Transit *transit = elm_transit_add(); elm_transit_object_add(transit, my_evas_object); elm_transit_effect_zoom_add(transit, 1, 0.5); elm_transit_duration_set(transit, 2.0); elm_transit_go(transit); -
Resizing effect
The resizing effect allows you to design an interpolation of the width and height attributes of 1 or more target elements using the
elm_transit_effect_resizing_add()function. The function defines the width and height of the object at the start and end of the animation.Note
Do not use this function to hide an Evas object by setting one of the length attributes to zero. Use the wipe effect described above instead.
The following example shows how to make a rectangle exchange its width and height properties in a 2-second transition:
Evas_Coord w, h; evas_object_geometry_get(my_evas_object, NULL, NULL, &w, &h); Elm_Transit *transit = elm_transit_add(); elm_transit_object_add(transit, my_evas_object); elm_transit_effect_resize_add(transit, /* Transition object */ w, h, /* Original size */ h, w); /* Target size */ elm_transit_duration_set(transit, 2.0); elm_transit_go(transit); -
Flip effect
The flip effect is a pseudo-3D effect where the first object in a pair is the front object and the second one is the back object. When the transition launches, the front object rotates around a preferred axis in order to let the back object take its place.
This flip effect combines the target Evas objects in pairs in the order they are listed in the transit object list. If you have more than 2 objects, each even object in the list is paired with the following odd object so that the even objects are shown at the beginning of the animation, and the odd objects when the transition is complete.
To implement a flip effect, use the
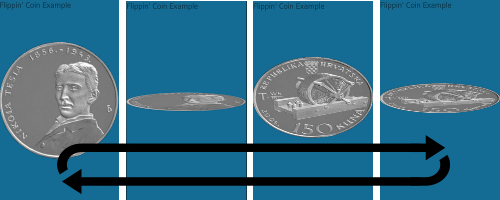
elm_transit_effect_flip_add()function.The following example shows how to create a coin that flips indefinitely. The example uses images as Elementary UI components for demonstration purposes. If you want to use the images directly as Evas objects, use the
elm_transit_effect_image_animation_add()function./* Coin head image */ Evas_Object *coin_heads = elm_image_add(ad->win); if (!elm_image_file_set(coin_heads, IMG_DIR"/coin_heads.png", NULL)) printf("error: could not load image"); elm_win_resize_object_add(ad->win, coin_heads); /* Coin tail image */ Evas_Object *coin_tails = elm_image_add(ad->win); if (!elm_image_file_set(coin_tails, IMG_DIR"/coin_tails.png", NULL)) printf("error: could not load image"); elm_win_resize_object_add(ad->win, coin_tails); /* Transition definition */ Elm_Transit *transit = elm_transit_add(); elm_transit_object_add(transit, coin_heads); elm_transit_object_add(transit, coin_tails); /* Flip takes 2 seconds */ elm_transit_duration_set(transit, 2.0); elm_transit_auto_reverse_set(transit, EINA_TRUE); /* Repeats indefinitely */ elm_transit_repeat_times_set(transit, -1); /* Flips clockwise around the X axis */ elm_transit_effect_flip_add(transit, ELM_TRANSIT_EFFECT_FLIP_AXIS_X, EINA_TRUE); elm_transit_go(transit);Figure: Coin flip
-
Resizable flip effect
In the flip example above, 2 objects of the same size are used. You can also flip objects with different size attributes, such as buttons with dimensions that depend on their content (such as labels).
If you decide to use the standard flip effect, the size of the object changes at the moment one object becomes completely hidden and the other one begins to show up. To interpolate the size attributes in the transition, use the resizable flip effect with the
elm_transit_effect_resizable_flip_add()function. The function works the exact same way as the standard flip effect function. -
Fade effect
To transition from one Evas object to another one using a fading effect where the first object slowly disappears to let the second object take its place, use the
elm_transit_effect_fade_add()function.The effect is applied to each pair of objects in the order in which they are listed in the transit object list. The first object in the pair is the before object and the second one is the after object.
Building on the coin flip example above, the following example shows how to fade out one face of the coin while fading in the other face:
Elm_Transit *transit = elm_transit_add();
elm_transit_object_add(transit, coin_heads);
elm_transit_object_add(transit, coin_tails);
elm_transit_duration_set(transit, 2.0);
elm_transit_effect_fade_add(transit);
elm_transit_go(transit);
To hide an object with a fade transition, use a transparent after object.
-
Blend effect
To transition from one Evas object to another one using a blend effect where the first object becomes blurry before the second object appears, use the
elm_transit_effect_blend_add()function.Building on the coin flip example above, the following example shows how to blur out one face of the coin while blurring in the other face:
Elm_Transit *transit = elm_transit_add();
elm_transit_object_add(transit, coin_heads);
elm_transit_object_add(transit, coin_tails);
elm_transit_duration_set(transit, 2.0);
elm_transit_effect_blend_add(transit);
elm_transit_go(transit);
To hide an object with a blend transition, use a transparent after object.
Using Parallel Transitions
To use multiple transitions at the same time on the same objects, create the Elm_Transit object and define multiple transition types for it one after another.
Building on the coin flip example in the previous section above, the following example shows how to roll the coin on the ground using parallel rotation and translation effects:
Evas_Object *coin_heads = elm_image_add(ad->win);
if (!elm_image_file_set(coin_heads, IMG_DIR"/coin_heads.png", NULL))
    printf("error: could not load image");
evas_object_resize(coin_heads, 100, 100);
evas_object_show(coin_heads);

Elm_Transit *transit = elm_transit_add();
elm_transit_object_add(transit, coin_heads);
elm_transit_duration_set(transit, 5.0);
elm_transit_effect_translation_add(transit, 0, 0, 3.1415 * 2 * 100, 0);
elm_transit_effect_rotation_add(transit, 0, 360);
elm_transit_go(transit);
Chaining Multiple Transitions Together
To create complex, chained animations without worrying about synchronization between the transitions, use the elm_transit_chain_transit_add() function. This function takes 2 Elm_Transit objects as parameters, and automatically takes care of the chaining: the second transition starts as soon as the first transition is finished.
The following example shows how to move a datetime component on a square trajectory:
Evas_Object *dt = elm_datetime_add(ad->win);
evas_object_resize(dt, 350, 50);
evas_object_show(dt);

/* First Elm_Transit: move datetime right */
Elm_Transit *t1 = elm_transit_add();
elm_transit_object_add(t1, dt);
elm_transit_duration_set(t1, 2);
elm_transit_effect_translation_add(t1, 0, 0, 100, 0);

/* Second Elm_Transit: move datetime up */
Elm_Transit *t2 = elm_transit_add();
elm_transit_object_add(t2, dt);
elm_transit_duration_set(t2, 2);
elm_transit_effect_translation_add(t2, 100, 0, 100, 100);

/* Third Elm_Transit: move datetime left */
Elm_Transit *t3 = elm_transit_add();
elm_transit_object_add(t3, dt);
elm_transit_duration_set(t3, 2);
elm_transit_effect_translation_add(t3, 100, 100, 0, 100);

/* Fourth Elm_Transit: move datetime down */
Elm_Transit *t4 = elm_transit_add();
elm_transit_object_add(t4, dt);
elm_transit_duration_set(t4, 2);
elm_transit_effect_translation_add(t4, 0, 100, 0, 0);

/* Chain the transitions */
elm_transit_chain_transit_add(t1, t2);
elm_transit_chain_transit_add(t2, t3);
elm_transit_chain_transit_add(t3, t4);

/* Start the first transition */
elm_transit_go(t1);
To manage the transition chain:
-
To create a looped animation chain, you have to use low-level components provided by the Ecore and Evas transition libraries.
Alternatively, you can use the
elm_transit_del_cb_set()function to define a callback for when a transition gets deleted. This way, you can recreate your objects and reiterate the transition chain as soon as the last transition ends.The first parameter is the transition object. The second parameter is the callback function to run on transition delete. The third parameter is the data to pass to the callback function.
elm_transit_del_cb_set(transit, on_transition_deleted, callback_data);Note
You cannot use transition chaining to make a loop animation, since the transit object is automatically destroyed as soon as the transition completes. Therefore, building on the above example, you cannot loop back from the
t4transit object to thet1transit object, because thet1transit object is already deleted at the beginning before thet2transit object is run:/* Impossible loop */ elm_transit_chain_transit_add(t4, t1); -
You can severe the chain relationship between 2 transit objects using the
elm_transit_chain_transit_del()function with the transit objects as parameters:elm_transit_chain_transit_del(transit1, transit2); -
To get the current chain transit list, use the
elm_transit_chain_transits_get()function.
Creating Custom Transitions
To implement the custom effects, use the elm_transit_effect_add() function. You can define custom transitions with any effects applied to some context data. The function relies on 3 callbacks that allow you to define every aspect of your transition from its creation to its deletion.
To build a custom resizing animation:
-
Define a structure capable of holding the context information about resizing an Evas object:
struct _Custom_Effect { struct _size { Evas_Coord w, h; } from, to; }; typedef struct _Custom_Effect Custom_Effect; -
Implement the callback for the custom effect operation, in this case, resizing. This callback actually performs the animation. The callback takes the following parameters:
- Context data that holds the custom properties of the transition, which are used as parameters to calculate the interpolation
- Transit object
- Progress (position along the animation timeline) that ranges from 0.0 to 1.0 and allows you to calculate the desired interpolation for each frame
The following example resizes the Evas objects in 2 steps. During the first half of the transition, only the height changes, while the width remains the same. During the second half, the width changes while the height remains the same.
static void _custom_op(void *data, Elm_Transit *transit, double progress) { if (!data) return; Evas_Coord w, h; Evas_Object *obj; const Eina_List *elist; Custom_Effect *custom_effect = data; const Eina_List *objs = elm_transit_objects_get(transit); /* During the first half, modify the height */ if (progress < 0.5) { h = custom_effect->from.h + (custom_effect->to.h * progress * 2); w = custom_effect->from.w; } else { /* During the second half, modify the width */ h = custom_effect->from.h + custom_effect->to.h; w = custom_effect->from.w + (custom_effect->to.w * (progress - 0.5) * 2); } EINA_LIST_FOREACH(objs, elist, obj) evas_object_resize(obj, w, h); } -
Define the context used by the effect:
static void* _custom_context_new(Evas_Coord from_w, Evas_Coord from_h, Evas_Coord to_w, Evas_Coord to_h) { Custom_Effect *custom_effect; custom_effect = calloc(1, sizeof(Custom_Effect)); if (!custom_effect) return NULL; custom_effect->from.w = from_w; custom_effect->from.h = from_h; custom_effect->to.w = to_w - from_w; custom_effect->to.h = to_h - from_h; return custom_effect; } -
Define the delete callback that is called at the end of the effect, removes all the context objects used by your custom transition, and frees up the allocated memory:
static void _custom_context_free(void *data, Elm_Transit *transit __UNUSED__) { free(data); } -
Apply the custom transition to the
Elm_Transitobject using theelm_transit_effect_add()function:- The first parameter is the
Elm_Transitobject. - The second parameter is the custom effect operation callback.
- The third parameter is the context of the new effect.
- The fourth parameter is the delete callback.
Elm_Transit *transit = elm_transit_add(); elm_transit_effect_add(transit, _custom_op, _custom_context_new(), _custom_context_free); - The first parameter is the
Note
Except as noted, this content is licensed under LGPLv2.1+.
Related Information
- Dependencies
- Since Tizen 2.4